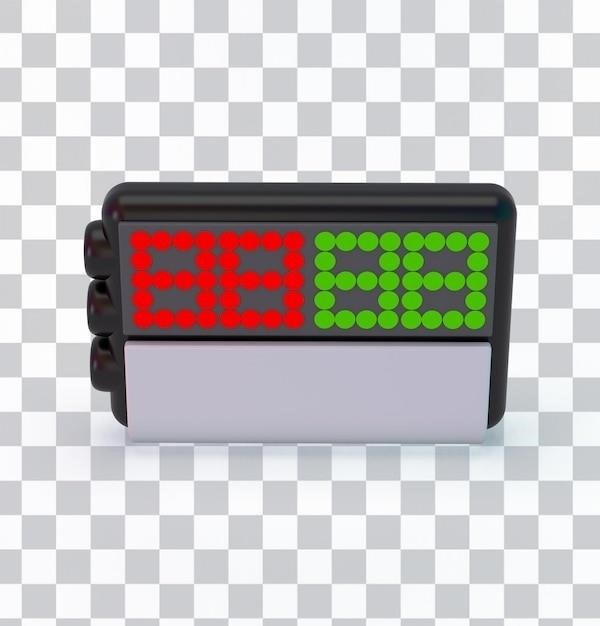
manual vaccum pump

Manual Vacuum Pumps⁚ A Comprehensive Guide

Manual vacuum pumps are hand-operated devices that create a vacuum by drawing air out of a sealed container or space. They are widely used in various applications, ranging from automotive repairs to medical procedures and industrial processes; Manual vacuum pumps offer a portable and cost-effective solution for creating a vacuum without the need for electricity or other external power sources; This comprehensive guide will delve into the different types of manual vacuum pumps, their applications, how they work, their advantages and disadvantages, and important considerations for choosing the right pump for your needs.

Introduction

Manual vacuum pumps, also known as hand vacuum pumps, are essential tools for creating a vacuum in various applications. These devices are portable, cost-effective, and operate without the need for electricity or external power sources, making them suitable for a wide range of tasks. From automotive repairs to medical procedures and industrial processes, manual vacuum pumps offer a reliable and convenient solution for creating a vacuum.

The principle behind manual vacuum pumps is simple⁚ they draw air out of a sealed container or space by creating a low-pressure environment. This low pressure is generated by the user’s physical action, typically by pulling a handle or piston. The resulting vacuum can then be used for various purposes, such as extracting fluids, testing for leaks, or holding objects in place.

Manual vacuum pumps come in a variety of designs and sizes, each tailored for specific applications. Some pumps are designed for high-volume evacuation, while others are optimized for precise pressure control. Regardless of their design, all manual vacuum pumps share the common function of creating a vacuum through the user’s manual operation.

Types of Manual Vacuum Pumps

Manual vacuum pumps come in a variety of designs, each suited for specific applications. Here are some common types⁚

Piston Pumps⁚ These pumps feature a piston that moves within a cylinder, creating a vacuum by drawing air out of the chamber. Piston pumps are typically used for high-volume evacuation and can generate a relatively high vacuum.

Diaphragm Pumps⁚ These pumps employ a flexible diaphragm that is moved by a handle or lever. As the diaphragm flexes, it creates a vacuum in the chamber. Diaphragm pumps are often used for applications where a compact and lightweight design is required.

Hand-Operated Vacuum Pumps⁚ These pumps are designed for easy and efficient operation with a single hand. They often feature a trigger or lever that allows the user to create a vacuum with minimal effort. Hand-operated vacuum pumps are commonly used in medical and automotive applications.

Vacuum Bleeder Pumps⁚ These pumps are specifically designed for bleeding brake systems in vehicles. They typically feature a gauge that allows the user to monitor the vacuum pressure and ensure proper bleeding;

The type of manual vacuum pump you choose will depend on the specific application and the required vacuum level. It’s important to consider factors like the volume of air to be evacuated, the desired vacuum pressure, and the portability requirements.

Applications of Manual Vacuum Pumps

Manual vacuum pumps are versatile tools with a wide range of applications across various industries. Their portability and ease of use make them ideal for tasks that require a vacuum without relying on electrical power. Here are some common applications of manual vacuum pumps⁚

Automotive Applications

Manual vacuum pumps are frequently used in automotive applications, such as⁚

  • Brake Bleeding⁚ They help remove air from brake lines, ensuring proper braking performance.
  • Vacuum Testing⁚ They can test the vacuum systems in vehicles, including the vacuum booster and other vacuum-operated components.
  • Fuel Transfer⁚ Some manual vacuum pumps can be used to transfer fuel from one container to another, making it easier to fill the tank without spilling.

Medical Applications

Manual vacuum pumps play a crucial role in medical settings, particularly in emergency situations⁚

  • Suction⁚ They are used to remove fluids from the mouth and nose, especially during emergencies or medical procedures.
  • Wound Care⁚ Manual vacuum pumps can help clean wounds and remove debris.

Industrial Applications

In industrial settings, manual vacuum pumps find applications in⁚

  • Vacuum Packaging⁚ They can be used to remove air from food packaging, extending shelf life and preserving freshness.
  • Fluid Transfer⁚ Manual vacuum pumps can help transfer various fluids, including liquids and gases, in industrial processes.

Automotive Applications

Manual vacuum pumps are indispensable tools for automotive technicians and DIY enthusiasts alike, offering a convenient and cost-effective way to perform various tasks. Their portability makes them ideal for on-the-go repairs and diagnostics, eliminating the need for bulky electrical equipment. Here are some common automotive applications of manual vacuum pumps⁚

  • Brake Bleeding⁚ One of the most frequent uses for manual vacuum pumps is bleeding brake systems. Air trapped in the brake lines can compromise braking performance, leading to a spongy feel or a complete loss of braking power. Manual vacuum pumps create a vacuum in the brake lines, pulling out the air and allowing for proper filling with brake fluid.
  • Vacuum Testing⁚ Various components in a vehicle rely on a vacuum to function correctly. Manual vacuum pumps allow technicians to test the vacuum system, including the vacuum booster, which assists in power braking. By applying a vacuum to the system, they can diagnose leaks or malfunctions in vacuum-operated components like door locks or actuators.
  • Fluid Transfer⁚ Manual vacuum pumps can be used to transfer fluids, such as fuel, oil, or coolant, from one container to another. This is particularly helpful when filling a vehicle’s tank or when transferring fluids for disposal or recycling. They provide a controlled and efficient method for fluid transfer, minimizing spills and mess.

Their compact size and ability to operate without electricity make manual vacuum pumps a valuable asset for any automotive toolkit.

Medical Applications

Manual vacuum pumps play a crucial role in various medical settings, particularly in emergency situations where immediate suction is required. Their portability, ease of use, and lack of dependence on electricity make them invaluable tools for medical professionals. Here are some notable medical applications of manual vacuum pumps⁚

  • Emergency Suction⁚ Manual vacuum pumps are essential for emergency suctioning of fluids from the oro- and pharyngeal cavities, such as vomit, blood, or mucus. This is critical for maintaining a clear airway and preventing aspiration, particularly in patients who are unconscious or have difficulty breathing.
  • Wound Drainage⁚ Manual vacuum pumps can be used to drain wounds and abscesses, promoting healing and reducing the risk of infection. By creating a vacuum, they draw fluids out of the wound, helping to reduce swelling and encourage tissue regeneration.
  • Medical Device Testing⁚ Manual vacuum pumps can be used to test the functionality of medical devices that rely on vacuum pressure, such as suction catheters, wound drainage systems, and certain types of medical equipment used for therapy or diagnostics.

The ability to provide a controlled and efficient vacuum makes manual vacuum pumps an indispensable tool for medical professionals in emergency response, patient care, and medical device testing.

Industrial Applications

Manual vacuum pumps find a wide range of applications in industrial settings, where they are often employed for tasks requiring controlled vacuum pressure, portability, and cost-effectiveness. These pumps are particularly valuable when dealing with small-scale operations or when access to electricity is limited. Here are some common industrial applications of manual vacuum pumps⁚

  • Fluid Transfer⁚ Manual vacuum pumps can be used to transfer fluids from one container to another, particularly liquids that are viscous or prone to clogging. They are often used for transferring fluids like oil, gasoline, or other chemicals in automotive repair, maintenance, and industrial settings.
  • Vacuum Packaging⁚ Manual vacuum pumps are used in conjunction with vacuum bags or containers to remove air, creating a vacuum environment that preserves food or other products. This method extends shelf life by preventing oxidation and microbial growth.
  • Leak Detection⁚ Manual vacuum pumps can be used to detect leaks in systems that operate under vacuum pressure, such as in plumbing, heating, and air conditioning systems. By applying a vacuum and monitoring for pressure changes, leaks can be pinpointed and addressed.
  • Filtration⁚ Manual vacuum pumps can be used in conjunction with filtration systems to draw liquids through filters, separating solid particles from the liquid. This is commonly used in various industries, including chemical processing, food and beverage production, and pharmaceuticals.

The versatility of manual vacuum pumps in industrial settings makes them a valuable tool for fluid transfer, packaging, leak detection, filtration, and other specialized applications.

How Manual Vacuum Pumps Work

Manual vacuum pumps operate on a simple principle that involves creating a partial vacuum by reducing the air pressure within a sealed chamber. This reduction in pressure is achieved through the use of a hand-operated mechanism, typically a piston or a diaphragm. Here’s a breakdown of the working process⁚

  1. Pumping Action⁚ The user initiates the pumping action by moving a handle or lever, which in turn drives a piston or diaphragm within the pump.
  2. Displacement of Air⁚ As the piston or diaphragm moves, it displaces air within the pump’s chamber. This displacement creates a lower pressure zone within the pump.
  3. Vacuum Creation⁚ The pressure difference between the lower pressure zone in the pump and the higher pressure zone in the connected container or system causes air to flow from the container into the pump. This flow of air continues until the pressure within the container is reduced to a level close to the pressure within the pump.
  4. Release of Air⁚ Once the pumping action stops, the air that has been drawn into the pump is typically released back into the atmosphere, allowing the pump to be ready for the next cycle.

The efficiency of a manual vacuum pump is determined by factors such as the size of the pump’s chamber, the stroke length of the piston or diaphragm, and the tightness of the seals. By repeatedly cycling the pumping action, a significant vacuum can be achieved, allowing for various applications.

Advantages of Manual Vacuum Pumps

Manual vacuum pumps offer a range of advantages that make them a practical and versatile tool for various applications. Their simplicity, portability, and affordability contribute to their widespread use in diverse settings. Here are some key benefits⁚

  • Portability⁚ Manual vacuum pumps are compact and lightweight, making them easily transportable. This portability is particularly advantageous in situations where access to electricity is limited or where mobility is crucial.
  • Cost-Effectiveness⁚ Compared to electric vacuum pumps, manual pumps are generally more affordable, making them an attractive option for budget-conscious individuals or for applications that do not require frequent or heavy-duty use.
  • Simplicity⁚ Manual vacuum pumps are simple in design and operation, requiring no specialized knowledge or training to use. Their straightforward mechanism ensures that even novice users can operate them effectively.
  • Reliability⁚ Manual vacuum pumps are known for their reliability, as they have fewer moving parts compared to electric pumps, reducing the risk of breakdowns. Their mechanical nature also makes them less susceptible to electrical failures or power fluctuations.
  • Environmentally Friendly⁚ Manual vacuum pumps do not require electricity, making them an eco-friendly option, particularly in situations where energy conservation is a priority.

These advantages make manual vacuum pumps a valuable tool for a wide range of tasks, from automotive repairs and medical procedures to industrial applications and hobbyist projects. Their versatility and ease of use have solidified their position as a reliable and convenient solution for creating vacuum in various settings.

Disadvantages of Manual Vacuum Pumps

While manual vacuum pumps offer several advantages, they also come with certain limitations that are important to consider before choosing them for a specific application. These drawbacks are primarily related to their manual operation and limited capacity.

  • Limited Vacuum Capacity⁚ Manual vacuum pumps are generally less powerful than electric pumps and have a lower vacuum capacity. This means they may not be suitable for applications requiring high vacuum levels or for evacuating large volumes of air.
  • Physical Effort⁚ Operating a manual vacuum pump requires physical effort, especially for extended periods or when creating a strong vacuum. This can be tiring and may not be suitable for individuals with physical limitations.
  • Slower Operation⁚ Manual pumps typically operate at a slower rate than electric pumps, requiring more time to achieve the desired vacuum level. This can be a drawback in applications where speed is essential.
  • Limited Applications⁚ Due to their limited power, manual vacuum pumps are not suitable for all applications. They may not be able to handle heavy-duty tasks or applications requiring a high flow rate of air.

It’s essential to weigh these disadvantages against the advantages before deciding if a manual vacuum pump is the right choice for your specific needs. For tasks requiring high vacuum levels, fast operation, or heavy-duty use, an electric vacuum pump may be a better option. However, for portable, cost-effective, and simple vacuum solutions, manual vacuum pumps remain a viable and reliable choice.

Choosing the Right Manual Vacuum Pump

Selecting the appropriate manual vacuum pump for your specific needs is crucial to ensure effective and efficient operation. Several factors should be considered before making a purchase, including the intended application, required vacuum level, volume of air to be evacuated, and desired portability.

  • Application⁚ Determine the specific task for which the pump will be used. Automotive repairs, medical procedures, industrial processes, or general household tasks will require different types of pumps.
  • Vacuum Level⁚ Consider the maximum vacuum level required for the application. Check the pump’s specifications to ensure it can achieve the desired vacuum.
  • Volume⁚ Assess the volume of air or fluid that needs to be evacuated. Some pumps are designed for smaller volumes, while others can handle larger capacities.
  • Portability⁚ If portability is a priority, choose a compact and lightweight pump. For stationary applications, a larger and more powerful pump might be suitable.
  • Materials and Construction⁚ Ensure the pump is made from durable materials resistant to corrosion and wear. Look for pumps with robust construction and reliable components.
  • Price⁚ Manual vacuum pumps are generally affordable, but prices can vary depending on features and quality.

By carefully evaluating these factors, you can choose a manual vacuum pump that meets your specific needs and provides reliable performance for your intended application.

Maintenance and Care of Manual Vacuum Pumps

Regular maintenance and proper care are essential to ensure the longevity and optimal performance of your manual vacuum pump. A well-maintained pump will operate smoothly, deliver accurate vacuum levels, and minimize the risk of malfunctions. Here’s a guide to basic maintenance practices⁚

  • Cleaning⁚ After each use, clean the pump thoroughly to remove any debris, dust, or contaminants that may have accumulated. Use a soft cloth and mild soap or detergent, avoiding harsh chemicals that could damage the pump’s components. Pay particular attention to the pump’s seals, valves, and hose connections, as these areas are prone to clogging.
  • Lubrication⁚ Depending on the pump’s design and operating conditions, it may require periodic lubrication. Refer to the manufacturer’s instructions for specific lubrication recommendations. Apply a small amount of light oil or grease to moving parts, such as the pump handle, piston, or seals.
  • Storage⁚ Store the pump in a clean and dry environment, protected from extreme temperatures, moisture, and dust. Store the pump with the handle extended to prevent any deformation or damage to the seals.
  • Inspection⁚ Regularly inspect the pump for signs of wear, damage, or leaks. Check the seals, valves, hose connections, and pump handle for any signs of wear or damage. Replace any worn or damaged components immediately to prevent malfunctions or safety hazards.

By following these simple maintenance practices, you can extend the life of your manual vacuum pump and ensure its reliable performance for years to come.

2011 ford fusion manual

2011 Ford Fusion Manual⁚ A Comprehensive Guide

This comprehensive guide provides a detailed overview of the 2011 Ford Fusion owner’s manual, covering essential features, specifications, maintenance tips, and troubleshooting advice. Whether you’re a new owner or a seasoned driver, this resource will help you understand and maximize your vehicle’s capabilities.

Introduction

The 2011 Ford Fusion owner’s manual serves as a valuable resource for understanding and maintaining your vehicle. It provides comprehensive information on every aspect of your Fusion, from basic operation and safety features to advanced technical details. This manual is designed to be user-friendly, with clear explanations and detailed illustrations to guide you through various tasks and procedures. Whether you’re a seasoned driver or a first-time car owner, this manual will empower you with the knowledge to operate and care for your Fusion effectively.

This manual is your go-to guide for everything related to your 2011 Ford Fusion. It covers topics such as engine and transmission operation, safety features, fuel efficiency, maintenance schedules, troubleshooting tips, and more. It is divided into sections for easy navigation, allowing you to quickly find the information you need.

Key Features and Specifications

The 2011 Ford Fusion is a mid-size sedan known for its comfortable interior, fuel-efficient engine options, and a wide array of standard and optional features. The manual details its key specifications, including dimensions, engine options, transmission choices, and available technology packages. You’ll find information on the exterior and interior design, seating capacity, cargo space, and available color options. It also outlines the standard safety equipment, such as airbags, anti-lock brakes, and electronic stability control.

The owner’s manual provides a detailed breakdown of the available trim levels, highlighting the unique features and options associated with each; From base models to higher-end trims, you’ll gain a clear understanding of the differences and what features are included in your specific Fusion. This information helps you understand the capabilities of your car and make informed decisions regarding its use and care.

Engine and Transmission

The 2011 Ford Fusion offers a variety of engine and transmission options, catering to different driving preferences and needs. The owner’s manual provides detailed information on each engine, including its displacement, horsepower, torque, and fuel economy ratings. You’ll find specific instructions on starting, stopping, and operating the engine, as well as recommendations for fuel type and maintenance schedules. The manual also details the different transmission types available, such as automatic and manual, highlighting their features, operation, and maintenance requirements.

The manual provides guidance on shifting techniques, explaining how to use the gears effectively for different driving conditions. It also includes information on the transmission fluid, its importance, and the recommended replacement intervals. Understanding the engine and transmission specifics allows you to optimize performance, fuel efficiency, and the overall longevity of your Fusion.

Interior and Exterior Design

The 2011 Ford Fusion’s owner’s manual provides a detailed exploration of the vehicle’s interior and exterior design. The manual offers a visual tour of the cabin, showcasing the layout, seating arrangement, and storage compartments. It describes the materials used for the upholstery, dashboard, and door panels, highlighting their quality and durability. The manual also explains the operation of the various interior features, including the climate control system, audio system, and optional navigation system.

For the exterior, the manual provides a comprehensive overview of the Fusion’s design elements. It describes the body style, including the dimensions, wheelbase, and overall aesthetics. The manual details the available exterior colors and trim options, allowing owners to personalize their vehicles. It also provides information on the exterior lighting system, including the headlights, taillights, and turn signals, explaining their operation and safety features.

Safety Features

The 2011 Ford Fusion’s owner’s manual delves into the comprehensive safety features designed to protect occupants in various driving situations. It outlines the standard and optional safety systems, providing detailed explanations of their operation and benefits. The manual highlights the advanced airbag system, including the frontal, side, and curtain airbags, describing their deployment mechanisms and the importance of proper seating positions. It also covers the anti-lock braking system (ABS), electronic stability control (ESC), and traction control, explaining how these systems work together to enhance vehicle stability and control, especially during challenging road conditions.

The manual further details the safety features designed for children, including the LATCH (Lower Anchors and Tethers for Children) system and the rearview camera. It provides instructions on proper seat installation and use, emphasizing the importance of child safety restraints. The manual also addresses other safety features, such as the daytime running lights, the tire pressure monitoring system, and the emergency assistance features, ensuring that owners are fully informed about the safety technology available in their vehicles.

Fuel Efficiency and Performance

The 2011 Ford Fusion’s owner’s manual provides insightful information regarding the vehicle’s fuel efficiency and performance capabilities. It details the various engine options available for the model, outlining their respective horsepower, torque, and fuel economy ratings. The manual emphasizes the importance of proper driving habits, such as maintaining a steady speed, avoiding aggressive acceleration and braking, and using cruise control when appropriate, to maximize fuel efficiency. It also provides guidance on tire pressure, engine oil viscosity, and other factors that can impact fuel consumption.

The manual further explores the Fusion’s performance characteristics, highlighting its acceleration, braking, and handling capabilities. It provides information on the vehicle’s suspension system, steering responsiveness, and overall driving dynamics. The manual also includes a section on towing capacity, outlining the maximum weight that the Fusion can safely tow, as well as recommendations for proper trailer hitch installation and use. By delving into both fuel efficiency and performance aspects, the owner’s manual empowers drivers to optimize their driving experience while understanding the limits and capabilities of their 2011 Ford Fusion.

Maintenance and Repair

The 2011 Ford Fusion owner’s manual serves as a comprehensive guide to keeping your vehicle in optimal condition. It outlines a detailed maintenance schedule, outlining recommended service intervals for various components, including oil changes, filter replacements, tire rotations, and fluid checks. This schedule helps ensure that routine maintenance is performed promptly, preventing potential issues and extending the life of your vehicle. The manual also provides valuable insights into potential problems and their solutions, empowering you to troubleshoot minor issues before they escalate into major repairs.

Furthermore, the manual includes detailed instructions for performing various maintenance tasks, such as replacing light bulbs, checking tire pressure, and topping off fluids. It also provides diagrams and illustrations to clarify procedures, making it easier for owners to perform basic maintenance themselves. This comprehensive approach equips owners with the knowledge and skills to maintain their 2011 Ford Fusion effectively, ensuring its reliability and longevity. By following the guidelines and recommendations outlined in the manual, you can keep your vehicle running smoothly and avoid costly repairs.

Routine Maintenance

The 2011 Ford Fusion owner’s manual emphasizes the importance of regular maintenance for optimal performance and longevity. It outlines a detailed schedule, outlining recommended service intervals for various components. This includes oil changes, filter replacements, tire rotations, and fluid checks. Following this schedule ensures that routine maintenance is performed promptly, preventing potential issues and extending the life of your vehicle. The manual also provides valuable insights into potential problems and their solutions, empowering you to troubleshoot minor issues before they escalate into major repairs.

The manual includes detailed instructions for performing various maintenance tasks, such as replacing light bulbs, checking tire pressure, and topping off fluids. It also provides diagrams and illustrations to clarify procedures, making it easier for owners to perform basic maintenance themselves. This comprehensive approach equips owners with the knowledge and skills to maintain their 2011 Ford Fusion effectively, ensuring its reliability and longevity. By following the guidelines and recommendations outlined in the manual, you can keep your vehicle running smoothly and avoid costly repairs.

Common Problems and Solutions

The 2011 Ford Fusion owner’s manual acknowledges that despite its robust design, certain issues can arise over time. The manual provides insights into common problems that owners may encounter, offering practical solutions and troubleshooting tips. These issues range from minor inconveniences to more serious concerns, covering various aspects of the vehicle, including the engine, transmission, electrical system, and brakes; For instance, the manual addresses potential issues with the power steering system, highlighting possible causes and suggesting remedies. It also provides guidance on identifying and resolving problems with the interior door handles, a recurring concern among 2011 Fusion owners.

The manual’s focus on common problems is designed to empower owners to address issues proactively. It equips them with the knowledge to identify potential problems early on, minimizing the risk of costly repairs. The manual also provides valuable information on potential warning signs and symptoms, allowing owners to take appropriate action before a minor issue escalates into a major problem. By addressing issues promptly and effectively, owners can maintain their 2011 Ford Fusion’s reliability and performance, ensuring a smooth and enjoyable driving experience.

Owner’s Manual Information

The 2011 Ford Fusion owner’s manual serves as a comprehensive guide to understanding and operating your vehicle. It’s a valuable resource that goes beyond basic instructions, offering detailed information on various aspects of your Ford Fusion. The manual is essential for navigating your vehicle’s features, performing routine maintenance, and understanding potential issues; It provides a wealth of information, including detailed explanations of each feature, step-by-step instructions for maintenance tasks, and troubleshooting tips for common problems. The manual also includes safety guidelines and recommendations to ensure a safe and enjoyable driving experience.

The owner’s manual is designed to be user-friendly, with clear and concise language, helpful illustrations, and organized sections for easy navigation. It covers a wide range of topics, from basic operation and features to advanced maintenance procedures. This comprehensive guide ensures that you have access to the information you need to understand and operate your 2011 Ford Fusion effectively.

Accessing the Manual

The 2011 Ford Fusion owner’s manual is readily accessible through various means, ensuring you can find the information you need whenever you need it. The most common way to obtain the manual is directly from the Ford website. Ford provides a dedicated section where you can easily locate the manual for your specific vehicle by entering your model year and trim level. The manual is available in PDF format, allowing you to download and print it for convenient access. Additionally, many online platforms specializing in car manuals offer free downloads of the 2011 Ford Fusion manual. These platforms often categorize manuals by make, model, and year, making it easy to locate the specific document you need.

If you prefer a physical copy of the manual, you can contact your local Ford dealership. Dealerships typically have a stock of owner’s manuals for various models, including the 2011 Ford Fusion. They can provide you with a printed copy or direct you to the online resources for downloading a digital version. You can also explore used car parts websites or online auction platforms, where individuals often sell used manuals for older car models. These options provide a convenient way to acquire a physical copy of the manual if you prefer a tangible resource.

Key Sections of the Manual

The 2011 Ford Fusion owner’s manual is organized into several key sections, each dedicated to a specific aspect of your vehicle. The “Introduction” section provides a general overview of the manual and its purpose, outlining the information it contains and how to use it effectively. The “Key Features and Specifications” section delves into the vehicle’s essential features, including its dimensions, engine and transmission details, and safety equipment. The “Engine and Transmission” section offers detailed information about the engine, its operation, and recommended maintenance procedures. It also explains how to use the transmission effectively, including tips for shifting gears and driving modes. The “Interior and Exterior Design” section provides a visual guide to the vehicle’s interior and exterior, highlighting key features, controls, and components. This section helps you familiarize yourself with the layout of your vehicle and understand its various functions.

The “Safety Features” section highlights the safety equipment and systems installed in the 2011 Ford Fusion. It explains how these features work, emphasizing their importance in protecting you and your passengers in case of an accident. The “Fuel Efficiency and Performance” section focuses on maximizing your vehicle’s fuel economy and performance. It provides tips for driving efficiently, minimizing fuel consumption, and optimizing engine performance. The “Maintenance and Repair” section offers comprehensive guidance on routine maintenance procedures, recommended service intervals, and troubleshooting common issues. It also provides information about vehicle repairs and where to find qualified technicians. The “Owner’s Manual Information” section outlines how to access the manual, its key sections, and how to use it effectively. It also explains the purpose of the manual and its importance in understanding and operating your vehicle safely and efficiently.

Where to Find a 2011 Ford Fusion Manual

Acquiring a 2011 Ford Fusion owner’s manual is quite straightforward. The most convenient option is to access the manual online. Numerous websites offer free downloadable PDFs of the 2011 Ford Fusion owner’s manual, allowing you to view and print it at your convenience. These websites often provide multiple editions of the manual, ensuring you have access to the most up-to-date version. Alternatively, you can search for a physical copy of the manual at used car dealerships or online marketplaces. While not as common as digital versions, physical copies are still available, especially for older model years. If you have lost your original manual, contacting your local Ford dealership is another option. Dealerships often have copies of owner’s manuals available for their customers, though they may charge a small fee for a replacement.

Finally, if you have the original manual but need a specific section, the Ford website offers a searchable database of owner’s manuals. You can search by vehicle model year, make, and specific topics to find the information you need. By exploring these various resources, you can easily obtain a copy of the 2011 Ford Fusion owner’s manual, ensuring you have all the information needed to understand and maintain your vehicle.

The 2011 Ford Fusion owner’s manual is an invaluable resource for any owner, providing comprehensive information about your vehicle’s features, operation, and maintenance needs. From understanding the engine and transmission to navigating the interior and exterior design, the manual offers clear explanations and detailed instructions. It also highlights safety features, fuel efficiency tips, and routine maintenance schedules, empowering you to keep your Ford Fusion running smoothly. By familiarizing yourself with the manual, you can ensure your vehicle’s longevity, safety, and optimal performance. Whether you’re a seasoned driver or a new owner, the 2011 Ford Fusion owner’s manual is an essential companion on your driving journey. The information contained within will help you understand and appreciate the features of your car while ensuring you have the knowledge to navigate any challenges that may arise.

apa manual sixth edition pdf

The APA Manual Sixth Edition is a comprehensive guide to writing and formatting research papers and other scholarly documents in the social sciences․ It is widely used in academic settings and is considered the standard for style and format in these fields․ This manual provides detailed instructions on everything from formatting citations and references to writing clear and concise prose․

The sixth edition of the APA Manual was published in 2010 and is still widely used today․ It is available in both print and electronic formats․ The electronic format is particularly convenient as it allows you to search for specific information quickly and easily․ You can also access the APA Style Guide online‚ which provides additional resources and updates on the APA style․

The APA Manual Sixth Edition PDF is an essential resource for students‚ researchers‚ and anyone else who writes or edits scholarly documents․ It provides a consistent framework for presenting information and helps ensure that your work is clear‚ concise‚ and accurate․

Introduction

The Publication Manual of the American Psychological Association (APA)‚ 6th Edition‚ is a comprehensive guide for writing and formatting research papers and other scholarly documents in the social and behavioral sciences․ Published in 2010‚ it has become the standard style guide for many academic disciplines‚ including psychology‚ sociology‚ education‚ and communication․ The manual provides detailed instructions on formatting‚ citations‚ references‚ and writing style‚ ensuring consistency and clarity in scholarly communication․

The APA Manual Sixth Edition is designed to help researchers and students present their work in a clear‚ concise‚ and professional manner․ It emphasizes ethical considerations‚ promotes accurate reporting of research findings‚ and encourages the use of precise and unbiased language․ The manual’s guidelines aim to facilitate the dissemination of knowledge‚ promote transparency in research‚ and enhance the credibility of scholarly publications․

The APA Manual Sixth Edition PDF is a valuable resource for anyone involved in academic writing and research․ It provides a standardized framework for formatting and citing sources‚ ensuring consistency across different fields and disciplines․ The manual’s comprehensive guidelines help researchers communicate their findings effectively and contribute to the advancement of knowledge within their respective fields․

Key Features of the APA Manual Sixth Edition

The APA Manual Sixth Edition is renowned for its detailed and comprehensive guidelines that promote clear‚ concise‚ and consistent writing․ Key features include⁚

  • Standardized Formatting⁚ The manual provides specific instructions for formatting all aspects of a research paper‚ including margins‚ font‚ spacing‚ headings‚ and page numbers‚ ensuring uniformity and professionalism․
  • In-text Citations⁚ The APA style utilizes parenthetical citations within the text‚ providing concise references to sources without interrupting the flow of writing․
  • Reference List Formatting⁚ The manual outlines a standardized format for creating a reference list that includes all sources cited in the text‚ allowing readers to easily locate and verify the information․
  • Ethical Guidelines⁚ The APA Manual emphasizes ethical research practices‚ promoting responsible data collection‚ analysis‚ and reporting․
  • Writing Style⁚ The manual provides guidelines for writing clear‚ concise‚ and objective prose‚ avoiding biased language and promoting inclusive language practices․
  • Tables and Figures⁚ The manual offers specific instructions for formatting and presenting tables and figures‚ ensuring clarity and accuracy in visual representations of data․

These features contribute to the APA Manual’s enduring relevance and its role as a standard for academic writing in the social sciences․

Formatting and Style Guidelines

The APA Manual Sixth Edition provides comprehensive formatting and style guidelines to ensure consistency and clarity in academic writing․ These guidelines cover various aspects of a research paper‚ including⁚

  • Margins and Spacing⁚ The manual specifies a standard 1-inch margin on all sides of the page and double-spacing throughout the text․ This formatting allows for easy readability and consistent visual presentation․
  • Font and Font Size⁚ The APA style requires using a 12-point Times New Roman font for the entire document‚ except for headings which may use different font sizes and styles․ This consistent font choice ensures readability and professional appearance․
  • Heading Levels⁚ The manual outlines a hierarchical system of heading levels‚ denoted by different font styles and sizes‚ to organize the paper and guide the reader through the information․ This clear structure helps readers understand the flow of the paper and locate specific information․
  • Page Numbers⁚ The APA style requires placing page numbers in the upper right corner of each page‚ starting with the title page․ This consistent page numbering ensures proper organization and easy navigation within the document․
  • Running Head⁚ The manual specifies a running head‚ a shortened version of the paper’s title‚ appearing on all pages after the title page․ This running head helps identify the paper and provides a concise reference for readers․

By adhering to these formatting and style guidelines‚ researchers ensure their work conforms to the APA standards‚ promoting clarity‚ professionalism‚ and consistent communication․

Margins and Spacing

The APA Manual Sixth Edition meticulously outlines specific margin and spacing guidelines to ensure consistency and readability in research papers․ These guidelines aim to create a visually appealing and easily digestible format‚ facilitating clear communication of research findings․

  • Margins⁚ The manual mandates a standard 1-inch margin on all sides of the page․ This consistent margin ensures sufficient white space around the text‚ improving readability and enhancing the visual appeal of the document․
  • Spacing⁚ Double-spacing is required throughout the entire research paper‚ including the title page‚ abstract‚ body paragraphs‚ and references․ This generous spacing enhances readability by preventing text crowding and providing a clear visual separation between lines․
  • Paragraph Indentation⁚ The APA style requires indenting the first line of each paragraph by 0․5 inches․ This indentation visually separates paragraphs‚ making the text more organized and easier to follow․
  • Line Spacing for Tables and Figures⁚ The manual specifies single-spacing for tables and figures‚ while maintaining double-spacing between the table/figure and the surrounding text․ This distinction provides a clear visual separation between textual content and tabular or graphical data․

By adhering to these margin and spacing guidelines‚ researchers ensure their work conforms to the APA standards‚ promoting a consistent and professional presentation of their research․

Font and Font Size

The APA Manual Sixth Edition emphasizes the use of a specific font and font size to ensure consistency and readability across research papers․ These guidelines aim to create a professional and easily digestible format‚ facilitating clear communication of research findings․

  • Font⁚ Times New Roman is the designated font for all text in APA-formatted papers․ This widely available and easily readable font is preferred for its classic appearance and consistent character spacing․
  • Font Size⁚ The standard font size for all text is 12 points․ This size strikes a balance between readability and conciseness‚ ensuring that the text is easily legible while maintaining an appropriate density on the page․
  • Font Style⁚ Regular font style is used for the majority of the text․ However‚ italics can be used for specific elements such as book titles‚ journal names‚ and foreign words or phrases․
  • Font Consistency⁚ Throughout the entire document‚ from the title page to the references‚ the designated font and font size should be consistently maintained․ This consistency contributes to a professional and polished presentation of the research․

Adhering to these font and font size guidelines ensures that research papers conform to APA standards‚ promoting a consistent and professional presentation of research findings․

Heading Levels

The APA Manual Sixth Edition employs a hierarchical system of heading levels to organize and structure research papers․ This system ensures that information is presented logically and helps readers navigate the document easily․

  • Level 1 Heading⁚ This is the highest level heading and is used for the main sections of the paper‚ such as Introduction‚ Method‚ Results‚ and Discussion․ It is centered and in boldface‚ using uppercase and lowercase letters (e․g․‚ Introduction)․
  • Level 2 Heading⁚ This level is used for subsections within a main section․ It is left-aligned and in boldface‚ using uppercase and lowercase letters (e․g․‚ Participants)․
  • Level 3 Heading⁚ This level is used for sub-subsections within a subsection․ It is indented‚ in boldface‚ and uses uppercase and lowercase letters (e․g․‚ Recruitment Procedures)․
  • Level 4 Heading⁚ This level is used for further subdivisions of a sub-subsection․ It is indented‚ in boldface‚ and uses uppercase and lowercase letters‚ but is italicized (e․g․‚ Demographic Characteristics)․
  • Level 5 Heading⁚ This level is rarely used and is indented‚ italicized‚ and uses uppercase and lowercase letters (e․g․‚ Data Analysis)․

By adhering to this heading level hierarchy‚ researchers ensure a clear and organized presentation of their research‚ making it easier for readers to follow the flow of information and comprehend the key findings of the study․

In-Text Citations

In-text citations are a crucial component of academic writing‚ serving to acknowledge the sources of information used in a research paper․ The APA Manual Sixth Edition provides specific guidelines for formatting these citations‚ ensuring consistency and clarity․

The primary purpose of in-text citations is to provide readers with the necessary information to locate the source in the reference list․ These citations are typically placed within parentheses and include the author’s last name and the year of publication․ For example‚ (Smith‚ 2018)․ If a direct quotation is used‚ the page number is also included (Smith‚ 2018‚ p․ 15)․

In-text citations can appear in various forms depending on the context․ For instance‚ if the author’s name is mentioned in the text‚ only the year of publication is included in parentheses․ For example‚ “Smith (2018) found that․․․”․

The APA Manual Sixth Edition emphasizes the importance of accurately and consistently citing sources to avoid plagiarism and maintain academic integrity․ By following these guidelines‚ researchers can ensure that their work is credible and that the contributions of others are properly acknowledged․

Basic Citation Format

The APA Manual Sixth Edition outlines a standardized format for in-text citations‚ ensuring clarity and consistency across research papers․ This format typically includes the author’s last name and the year of publication‚ enclosed in parentheses․ For example‚ (Smith‚ 2018)․ When referencing a specific passage‚ the page number is also included‚ separated by a comma (Smith‚ 2018‚ p․ 15); This format allows readers to readily identify the source and locate it in the reference list․

When citing multiple works by the same author published in the same year‚ lowercase letters are appended to the year‚ alphabetically ordered based on the publication order․ For example‚ (Smith‚ 2018a‚ 2018b)․ If citing multiple authors‚ all names are included‚ separated by an ampersand (&) for two authors or commas for three or more․ For example‚ (Smith & Jones‚ 2018) or (Smith‚ Jones‚ & Brown‚ 2018)․

The APA Manual Sixth Edition emphasizes the importance of accurate and consistent citations‚ ensuring that credit is given to the original authors and that readers can easily locate the sources used in a research paper․

Direct Quotations

The APA Manual Sixth Edition provides specific guidelines for incorporating direct quotations within research papers․ When using direct quotations‚ it is crucial to maintain the original wording and punctuation․ Short quotations‚ less than ‚ are embedded within the text and enclosed in double quotation marks․ For example‚ “The study found that participants who received the intervention showed significant improvements in their scores” (Smith‚ 2018‚ p․ 12)․

Longer quotations‚ exceeding ‚ are presented as block quotations‚ indented from the left margin and without quotation marks․ The citation follows the final punctuation of the quotation․ For example⁚

The study found that participants who received the intervention showed significant improvements in their scores․ The results suggest that the intervention was effective in addressing the specific needs of the participants and promoting positive changes in their outcomes․ (Smith‚ 2018‚ p․ 12)

In both cases‚ the source of the quotation is clearly identified with the author’s last name‚ year of publication‚ and page number․ This ensures that readers can easily locate the original source and verify the accuracy of the quoted material․

Reference List

The reference list is a crucial component of any APA-formatted research paper‚ providing a comprehensive list of all sources cited within the text․ The APA Manual Sixth Edition outlines specific formatting guidelines for constructing reference list entries․ The reference list appears at the end of the paper‚ on a separate page titled “References‚” and is arranged alphabetically by the author’s last name․

Each reference entry includes essential information‚ such as the author(s) names‚ year of publication‚ title of the work‚ source details (e․g․‚ journal name‚ publisher)‚ and retrieval information (for online sources)․ The format of reference entries varies depending on the type of source (e․g․‚ journal article‚ book‚ website)․ Consistent formatting ensures clarity and allows readers to easily locate and verify the sources used in the paper․

The APA Manual Sixth Edition provides detailed examples and guidelines for creating accurate and complete reference list entries․ Following these guidelines ensures that the reference list accurately reflects the sources used in the research paper and contributes to the overall credibility and rigor of the work․

cls1410 manual

Motorola CLS1410 Two-Way Radio Manual

This comprehensive manual provides detailed instructions and information on the features‚ operation‚ and maintenance of the Motorola CLS1410 two-way radio. The CLS1410 is a powerful and reliable communication device designed for businesses‚ offering enhanced voice quality‚ privacy‚ and reliability. This manual covers topics such as getting started‚ radio controls‚ talking and receiving‚ programming mode‚ cloning radio settings‚ advanced features‚ troubleshooting‚ and frequencies and bandwidths.

Introduction

Welcome to the world of reliable and efficient communication with the Motorola CLS1410 Two-Way Radio. This user guide is your comprehensive resource for understanding and utilizing all the features of this powerful device. Designed for businesses seeking clear‚ secure‚ and cost-effective communication‚ the CLS1410 offers a range of functionalities to enhance your operations. Whether you’re managing a retail store‚ restaurant‚ hotel‚ or school‚ this two-way radio provides the connectivity you need to stay connected and in control. This manual will guide you through the basics of getting started‚ exploring radio controls‚ understanding how to talk and receive messages‚ and navigating the programming mode. It also delves into advanced features‚ troubleshooting tips‚ and information on frequencies and bandwidths.

With its user-friendly interface and robust design‚ the CLS1410 is built to withstand the demands of your everyday operations. This manual will help you maximize the potential of your CLS1410 and ensure seamless communication within your team.

Features

The Motorola CLS1410 Two-Way Radio is packed with features designed to streamline communication and enhance productivity in your business. The CLS1410 operates on a UHF band with up to 4 channels‚ providing flexibility for different communication needs within your organization. You can choose from 56 business-exclusive frequencies‚ ensuring clear and private conversations‚ while 121 codes (38 analog and 83 digital) add an extra layer of security and privacy. The radio is equipped with a 1-watt power output for reliable communication over a reasonable range. The 12.5kHz bandwidth ensures clear audio quality‚ even in noisy environments.

The CLS1410 boasts a user-friendly interface with an LCD display that provides clear visibility of channel information and other settings. For added convenience‚ the radio features keypad lock to prevent accidental button presses‚ and a scan function allows you to monitor multiple channels simultaneously. The CLS1410 also offers advanced voice activation (VOX) for hands-free operation (optional accessory required); To enhance awareness‚ the radio includes a VibraCall Alert feature‚ providing discreet notifications for incoming calls.

Getting Started

Setting up your Motorola CLS1410 Two-Way Radio is a straightforward process. The kit includes the radio itself‚ a rechargeable lithium-ion battery‚ a drop-in charging cradle with an AC adapter‚ and a swivel belt holster for easy carrying. Begin by installing the battery into the radio. Locate the battery compartment on the back of the radio and slide the battery in‚ ensuring that the contacts align correctly. Next‚ place the radio in the charging cradle and connect the AC adapter to a power outlet. Allow the battery to charge fully before using the radio for the first time.

Once the battery is charged‚ you can install the swivel belt holster. The holster allows you to wear the radio securely on your belt and easily access it when needed. To install the holster‚ simply clip it onto your belt and then slide the radio into the holster. You can now turn on the radio by pressing the power button located on the side of the device. The radio will display the current channel and other relevant information on the LCD screen. You are now ready to start communicating with your team.

Radio Controls

The Motorola CLS1410 Two-Way Radio is equipped with a user-friendly interface and intuitive controls. The front of the radio features the Push-to-Talk (PTT) button‚ which is used to transmit your voice. The PTT button is prominently located for easy access‚ allowing you to quickly communicate with your team. Above the PTT button‚ you’ll find the channel selection buttons‚ which enable you to switch between different communication channels. The CLS1410 supports up to four channels‚ providing flexibility for different work groups or tasks.

On the side of the radio‚ you’ll find the power button‚ which turns the device on and off; The radio also features a volume control knob‚ allowing you to adjust the audio output to your preference. The LCD screen displays essential information‚ including the current channel‚ battery level‚ and signal strength. The keypad lock feature prevents accidental button presses while the radio is in your pocket or holster. For added convenience‚ the CLS1410 includes a scan function‚ which allows you to automatically monitor multiple channels for incoming transmissions.

Talking and Receiving

To transmit a message‚ simply press and hold the Push-to-Talk (PTT) button and speak clearly into the microphone. When you release the PTT button‚ the transmission will end. Ensure that you are speaking at a normal volume and maintain a clear distance between your mouth and the microphone for optimal audio quality. The CLS1410 also features an optional voice activation (VOX) accessory‚ which allows for hands-free communication. With VOX enabled‚ you can initiate a transmission by simply speaking into the radio‚ eliminating the need to press the PTT button. This is particularly useful in situations where your hands are occupied.

To receive a message‚ simply listen to the radio’s speaker. When another user on the same channel transmits a message‚ you will hear their voice through the speaker. The radio’s volume can be adjusted using the volume control knob to ensure clear reception. If you miss a message‚ the CLS1410 offers a scan function‚ which automatically monitors multiple channels for incoming transmissions. This allows you to quickly check for any missed messages. The radio also features a VibraCall Alert function‚ which provides a discreet vibration notification when a call is received.

Programming Mode

The Programming Mode on your CLS1410 radio allows you to customize various settings to suit your specific communication needs. To enter Programming Mode‚ press and hold the MENU button until the radio beeps and displays “PROG.” From here‚ you can navigate through various menu options using the UP and DOWN buttons. The Programming Mode offers a range of customizable settings‚ including channel selection‚ frequency allocation‚ code assignment‚ and more.

The CLS1410 supports up to four channels‚ allowing you to create separate communication groups for different departments or tasks. Each channel can be assigned a unique frequency and code‚ enhancing security and privacy. You can also adjust settings such as scan mode‚ call tones‚ and volume levels within the Programming Mode. To exit Programming Mode‚ simply press and hold the PTT button. Refer to the user manual for detailed instructions on accessing and navigating through the Programming Mode‚ as well as for specific programming procedures for each setting.

Cloning Radio Settings

Cloning radio settings on your CLS1410 allows you to replicate the configuration of one radio to another. This is particularly useful when you need to set up multiple radios with identical settings‚ such as for a team or a department. The cloning process eliminates the need to manually program each radio individually‚ saving time and effort. To clone radio settings‚ you will need a second CLS1410 radio that has the desired settings.

The cloning process typically involves connecting the two radios using a programming cable and following the steps outlined in the user manual. The programming cable connects to the radios’ programming ports‚ allowing the data transfer between them. During the cloning process‚ the settings from the source radio‚ which has the desired configuration‚ are transferred to the target radio‚ effectively mirroring its settings. Remember to consult the user manual for detailed instructions on cloning radio settings‚ including the required cable and specific procedures for your CLS1410 models.

Advanced Features

The Motorola CLS1410 two-way radio boasts several advanced features designed to enhance communication efficiency and user experience. One notable feature is the VibraCall Alert‚ which provides a discreet vibration notification when a call is received. This is particularly useful in environments where audible alerts might be disruptive or inappropriate. Another advanced feature is the scan function‚ allowing the radio to automatically scan through available channels to identify active transmissions.

For hands-free operation‚ the CLS1410 supports advanced voice activation (VOX) functionality. With the use of an optional accessory‚ the radio can be configured to transmit audio when it detects your voice‚ enabling hands-free communication while performing other tasks. The CLS1410 also offers a range of call tones‚ allowing users to customize the alert sound for incoming calls. These advanced features‚ along with the other capabilities of the CLS1410‚ make it a versatile and effective communication tool for businesses and individuals requiring reliable and efficient communication.

Troubleshooting

If you encounter issues with your Motorola CLS1410 two-way radio‚ this section provides a guide to resolving common problems. First‚ check the radio’s battery level‚ ensuring it is sufficiently charged. A low battery can affect radio performance. Next‚ verify that the radio is properly switched on and that the volume is adjusted to an audible level. Ensure the antenna is securely attached and not damaged. If the problem persists‚ check if the radio is within range of other radios on the same channel. If the issue is related to audio quality‚ verify that the speaker and microphone are functioning correctly.

Ensure the PTT (Push to Talk) button is being pressed and released properly. If you are still experiencing difficulties‚ you can try resetting the radio to its factory settings. Refer to the user manual for instructions on performing a reset. If none of these steps resolve the issue‚ contact Motorola customer support for further assistance. They can provide more specific troubleshooting advice or suggest potential repairs if necessary.

Frequencies and Bandwidths

The Motorola CLS1410 operates within the UHF (Ultra High Frequency) band‚ specifically utilizing business-exclusive frequencies. The radio features a selection of 56 frequencies‚ providing flexibility and reducing interference. These frequencies are designed for clear and reliable communication‚ minimizing disruptions from other radio signals. The CLS1410 also supports a 12.5 kHz bandwidth‚ which ensures efficient use of the radio spectrum while maintaining high-quality audio transmission.

The specific frequencies available for the CLS1410 may vary depending on regional regulations and licensing requirements. It is important to consult the user manual or contact Motorola for information on the frequencies permitted in your area. Understanding the frequencies and bandwidths used by your CLS1410 helps you optimize communication‚ minimizing interference and ensuring clear and reliable communication within your business environment.

manual clutch for predator 212

Manual Clutch for Predator 212⁚ A Comprehensive Guide

This guide will provide you with a comprehensive overview of manual clutches for Predator 212 engines, focusing on the benefits, types, installation, and maintenance of these powerful upgrades. We’ll delve into the popular 3D Motorsport manual clutch, detailing its features and installation process. Whether you’re a seasoned kart racer or a novice looking to enhance your Predator 212 powered vehicle, this guide will equip you with the knowledge to make informed decisions and unleash the full potential of your engine.

Introduction

The Predator 212 engine, renowned for its power and affordability, is a popular choice for go-karts, mini bikes, and other small-scale vehicles. While the engine’s centrifugal clutch provides an automatic transmission system, many enthusiasts opt for a manual clutch for enhanced control and performance. A manual clutch allows the driver to engage and disengage power to the wheels at will, offering a more responsive and engaging driving experience. This transition from automatic to manual operation unlocks a world of possibilities for those seeking to refine their driving skills and optimize the performance of their Predator 212-powered machine.

This comprehensive guide delves into the world of manual clutches for Predator 212 engines, exploring their benefits, types, installation procedures, and maintenance tips. We’ll unpack the key aspects of these clutches, providing you with the knowledge to make informed decisions and enhance your understanding of this popular engine modification. Whether you’re looking to improve your kart’s acceleration, achieve smoother gear changes, or simply enjoy a more engaging driving experience, this guide will serve as your roadmap to the world of manual clutches for Predator 212 engines.

The Benefits of a Manual Clutch

Installing a manual clutch on your Predator 212 engine offers a range of advantages over the standard centrifugal clutch, enhancing both performance and driving enjoyment. One of the most significant benefits is the ability to precisely control power delivery. With a manual clutch, you can seamlessly engage and disengage power, enabling smoother acceleration, improved traction, and enhanced control during cornering and braking. This level of precision is particularly valuable in racing applications, where every fraction of a second counts.

Beyond performance benefits, manual clutches provide a more engaging driving experience. The act of shifting gears manually adds an element of skill and control, making the driving process more interactive and rewarding. It allows drivers to fine-tune their driving style, optimizing performance based on track conditions and personal preferences. Furthermore, the ability to disengage the clutch provides a safety advantage, enabling drivers to quickly stop the engine or prevent stalling in situations where the engine may be overloaded.

In summary, a manual clutch is a valuable upgrade for Predator 212 engine users seeking enhanced control, improved performance, and a more engaging driving experience. It provides the driver with the ability to precisely manage power delivery, optimize acceleration and braking, and enjoy a more responsive and rewarding driving experience.

Types of Manual Clutches

When it comes to manual clutches for Predator 212 engines, there are a few key types to consider, each with its own advantages and drawbacks. The most common type is the cable-operated clutch, which is typically found on go-karts and mini bikes. These clutches use a cable to engage and disengage the clutch, making them relatively simple to install and operate. They offer a good balance of performance and ease of use, making them a popular choice for many enthusiasts.

Another type of manual clutch is the hydraulic clutch. These clutches use hydraulic pressure to engage and disengage the clutch, providing a smoother and more precise feel compared to cable-operated clutches. Hydraulic clutches are often found on higher-performance karts and mini bikes, where the demand for precise control is greater. However, they can be more complex to install and require regular maintenance of the hydraulic system.

Finally, there are centrifugal clutches, which are typically used as automatic clutches on Predator 212 engines. These clutches engage and disengage based on engine speed, eliminating the need for a manual shift lever. While convenient, centrifugal clutches lack the control and precision of manual clutches, making them less desirable for performance-oriented applications. When choosing a manual clutch for your Predator 212 engine, carefully consider the type that best suits your needs and budget.

The 3D Motorsport Manual Clutch

The 3DME clutch, a patent-pending innovation by 3D Motorsport Engineering, stands out as a highly regarded option for Predator 212 engine enthusiasts. This cable-operated bolt-on unit is designed for straightforward installation, replacing a typical centrifugal clutch in a matter of minutes. Its user-friendly design and ease of installation make it a popular choice among kart racers and mini bike enthusiasts seeking a performance upgrade.

The 3DME clutch is renowned for its robust construction and high-quality components, ensuring reliable performance even under demanding conditions. It is specifically tailored to the Predator 212 engine, providing a perfect fit and seamless integration. Its compatibility with various kart and mini bike setups makes it a versatile choice for diverse applications.

The 3DME clutch offers several advantages over centrifugal clutches. It provides greater control and precision over engine power delivery, enabling drivers to fine-tune their performance and maximize acceleration. The ability to engage and disengage the clutch manually allows for more deliberate starts, smoother transitions, and improved overall driving experience. The 3DME clutch is a valuable upgrade for those seeking enhanced control, responsiveness, and performance from their Predator 212 engine.

Installation Process

Installing a manual clutch on your Predator 212 engine is a straightforward process that can be completed with basic tools and a little mechanical knowledge. Here’s a step-by-step guide to help you through the installation⁚

Step 1⁚ Preparation

Gather the necessary tools, including wrenches, screwdrivers, and a torque wrench. Ensure you have a clean and well-lit workspace to minimize the risk of errors. Consult your manual clutch kit instructions for specific tools and requirements.

Step 2⁚ Removing the Centrifugal Clutch

Begin by removing the centrifugal clutch from your Predator 212 engine. This typically involves loosening the nuts or bolts securing the clutch to the engine shaft. Refer to your engine’s manual or the manual clutch kit instructions for specific removal procedures.

Step 3⁚ Installing the Manual Clutch

With the centrifugal clutch removed, carefully align and install the new manual clutch onto the engine shaft. Secure it using the provided nuts or bolts, ensuring proper alignment and tightness. Double-check that the clutch is properly installed and secured before proceeding to the next step.

Step 1⁚ Preparation

Before embarking on the manual clutch installation, it’s crucial to ensure you have everything you need at hand. This step involves gathering the necessary tools, materials, and resources to make the process smooth and efficient; Start by carefully reviewing the manual clutch kit instructions, as it will outline the specific tools required for your particular kit.

Here’s a list of commonly needed tools⁚

  • Wrenches⁚ These will be essential for loosening and tightening nuts and bolts during the installation process. Ensure you have the correct sizes for your engine and clutch.
  • Screwdrivers⁚ You’ll need various sizes of screwdrivers for removing and securing screws, depending on the design of your manual clutch and engine mounting.
  • Torque Wrench⁚ This specialized tool is vital for ensuring bolts are tightened to the correct specifications, preventing over-tightening and potential damage.

Beyond the tools, make sure you have a clean and well-lit workspace. This will minimize the risk of losing small parts and help you see clearly during the installation. It’s also a good idea to have a container for collecting the removed hardware.

Step 2⁚ Removing the Centrifugal Clutch

The first step in installing a manual clutch is to remove the existing centrifugal clutch. This process involves carefully disconnecting the clutch from the engine and the drive system, ensuring you don’t damage any components. Begin by disconnecting the spark plug wire to prevent accidental engine start-up. Next, identify the clutch mounting bolts, which are typically located around the outer edge of the clutch assembly. These bolts secure the clutch to the engine’s output shaft.

Using your wrenches, carefully loosen the mounting bolts. Be mindful of the torque specifications provided in your manual clutch kit instructions, as over-tightening can damage the engine or clutch components. Once the bolts are loosened, gently remove them from the clutch assembly. It’s recommended to keep track of the removed hardware in a designated container to avoid losing any parts.

With the mounting bolts removed, the centrifugal clutch can be carefully lifted off the engine output shaft. Pay attention to the clutch alignment and any potential interference with the engine case or other components. Once the clutch is removed, inspect it for any signs of wear or damage. This step ensures proper operation and prevents potential issues with the new manual clutch.

Step 3⁚ Installing the Manual Clutch

Now that the centrifugal clutch is removed, you can begin installing the manual clutch. The installation process typically involves aligning the new clutch with the engine output shaft and securing it with the provided mounting bolts. Ensure the clutch is properly positioned, with the input shaft aligned with the engine’s output shaft and the output shaft aligned with the drive system.

Carefully slide the manual clutch onto the engine output shaft. Ensure that the clutch engages smoothly and does not bind or rub against any components. Once the clutch is in place, align the mounting holes on the clutch with the corresponding holes on the engine case. Remember to refer to the installation instructions provided with your manual clutch kit for specific alignment guidelines.

Using the provided bolts, secure the manual clutch to the engine case. Tighten the bolts to the specified torque specifications. Be careful not to over-tighten the bolts, as this can damage the engine or clutch components. Once the bolts are securely fastened, you have successfully installed the manual clutch. Remember to double-check the alignment and secureness of the clutch before proceeding to the next step.

Adjusting the Clutch Cable

After installing the manual clutch, it’s crucial to adjust the clutch cable for optimal performance and smooth engagement. The clutch cable connects the clutch lever to the clutch mechanism, enabling you to control the engagement and disengagement of the clutch. Proper adjustment ensures that the clutch engages and disengages at the desired points and prevents premature wear on the clutch components.

Start by locating the adjustment mechanism on the clutch cable. This is typically a barrel adjuster or a set screw located near the clutch lever or the clutch mechanism itself. The adjustment mechanism allows you to fine-tune the cable tension. The goal is to achieve a balance between the clutch engaging smoothly and preventing excessive slippage.

With the engine off, slowly adjust the cable tension. You can test the adjustment by gently pulling the clutch lever. The lever should move smoothly, and the clutch should engage and disengage without any noticeable hesitation or binding; If the clutch engages too easily or slips excessively, adjust the cable tension accordingly until you find the sweet spot. Remember that the specific adjustment process may vary depending on the type of manual clutch and cable used. Consult the installation instructions or the manufacturer’s recommendations for detailed guidance on adjusting your specific setup.

Testing and Fine-Tuning

Once the manual clutch is installed and the cable is adjusted, it’s time to test its performance and fine-tune the setup for optimal results. Start by carefully starting the engine and engaging the clutch. Observe how the engine responds to the clutch lever. The clutch should engage smoothly and without any sudden jolts or hesitation. The engine should rev up smoothly when the clutch is disengaged and accelerate smoothly when the clutch is fully engaged.

If you notice any issues, such as excessive slippage or difficulty engaging the clutch, you may need to make further adjustments to the clutch cable. You can also experiment with different clutch settings, such as the point at which the clutch engages, to optimize performance based on your driving style and terrain.

Testing and fine-tuning should be done in a safe environment, preferably on a flat surface. Start at low speeds and gradually increase the speed as you become familiar with the clutch’s behavior. Listen for any unusual noises or vibrations coming from the clutch or engine. These could indicate problems that need to be addressed. By taking the time to test and fine-tune the manual clutch, you can ensure a smooth and reliable performance that enhances the overall driving experience.

Maintenance and Troubleshooting

Proper maintenance is crucial for ensuring the longevity and smooth operation of your Predator 212 manual clutch. Regularly inspect the clutch cable for signs of wear, fraying, or corrosion. Replace the cable if necessary, as a worn cable can affect the clutch’s engagement and disengagement. Also, periodically lubricate the clutch cable to prevent sticking and ensure smooth operation.

Pay attention to the clutch lever and its mounting points. Ensure that the lever is properly secured and that the mounting points are free from cracks or damage. A loose or damaged lever can compromise the clutch’s operation and potentially lead to safety issues. During routine maintenance, inspect the clutch itself for any signs of wear or damage. Check for excessive wear on the clutch plates, springs, or other components. Replace any worn or damaged parts promptly to prevent further damage and ensure proper operation.

Troubleshooting common problems with manual clutches can be done with a few simple steps. If the clutch slips excessively, it could be due to worn clutch plates or a faulty cable. Adjust the clutch cable to increase the engagement force. If the clutch doesn’t engage smoothly, check for any kinks, binding, or damage in the cable. Replace the cable if necessary. If the clutch makes unusual noises, inspect the clutch for worn or damaged components. Remember to always consult the manufacturer’s instructions and seek professional help if you’re unsure about any maintenance or troubleshooting steps. By following these tips, you can ensure that your manual clutch remains in optimal condition and delivers reliable performance.

Alternatives to Manual Clutches

While manual clutches offer a level of control and engagement that centrifugal clutches can’t match, they are not the only option for Predator 212 engines. For those seeking a more simplified setup, centrifugal clutches remain a popular choice. These clutches automatically engage when the engine reaches a certain RPM, eliminating the need for a clutch lever and cable. Centrifugal clutches are generally easier to install and require less maintenance, making them a suitable choice for beginners or those who prefer a simpler setup.

Another alternative to manual clutches is the torque converter. Torque converters are essentially automatic transmissions that use a fluid coupling to transfer power from the engine to the wheels. They offer smooth acceleration and effortless operation, particularly beneficial in applications where frequent shifting is required. However, torque converters are typically more expensive and complex than centrifugal clutches.

Ultimately, the choice between a manual clutch, a centrifugal clutch, or a torque converter depends on your specific needs, budget, and desired performance. Consider the type of kart or mini-bike you’re building, your experience level, and your desired level of control when deciding which clutch system is best suited for your application. Each type of clutch has its own advantages and disadvantages, so it’s important to weigh these factors carefully before making a decision.

heatilator gas fireplace user manual

This manual provides comprehensive information on the installation, operation, maintenance, and troubleshooting of your Heatilator gas fireplace. It is essential to carefully read and understand this manual before installing or operating your fireplace. This manual applies to all models and gas control systems, unless otherwise specified.

Introduction

Congratulations on choosing a Heatilator gas fireplace! Your new fireplace is designed to provide years of enjoyment and warmth. This manual will guide you through the installation, operation, and maintenance of your Heatilator gas fireplace, ensuring you get the most out of your investment. Heatilator fireplaces are known for their beautiful design, reliable heating, and lasting quality.

Heatilator offers a wide selection of fireplaces, mantels, and accessories for your home and patio. Their products are designed to enhance the ambiance and comfort of any space.

Safety Precautions

Your safety and the safety of others is paramount. It is crucial to adhere to all safety precautions outlined in this manual to prevent accidents and ensure proper operation of your Heatilator gas fireplace.

Always exercise caution when handling the fireplace and its components. Keep flammable materials, such as furniture, curtains, and paper, at a safe distance from the fireplace.

Never leave the fireplace unattended while it is operating.

Children and pets should be supervised at all times near the fireplace.

Regularly inspect the fireplace for any signs of damage or wear and tear.

In the event of any malfunction or concern, immediately cease operation and contact a qualified technician for assistance.

Installation

Installing your Heatilator gas fireplace is a critical step that requires careful attention to detail and adherence to all safety guidelines. This section provides essential instructions and information to ensure a proper and safe installation. It’s important to note that if you are not comfortable or confident in performing the installation yourself, it is highly recommended to seek assistance from a qualified and certified installer.

They possess the necessary expertise and knowledge to handle the installation process correctly, ensuring the fireplace is installed according to local building codes and safety standards.

By following the instructions provided in this manual and seeking professional assistance when needed, you can ensure a safe and successful installation of your Heatilator gas fireplace.

Preparing for Installation

Before embarking on the installation process, it’s crucial to thoroughly prepare the area where your Heatilator gas fireplace will be situated. This preparation ensures a smooth and successful installation, minimizing potential complications and ensuring a safe environment.

First, carefully review the installation instructions provided in this manual to understand the specific requirements for your fireplace model.

Next, ensure that the chosen location for your fireplace meets the minimum clearance requirements outlined in the manual. This involves ensuring adequate space around the fireplace for proper ventilation and to prevent potential fire hazards.

Finally, clear the area surrounding the installation site of any obstructions that could hinder the installation process, such as furniture, boxes, or other items.

Connecting Gas Lines

Connecting the gas lines to your Heatilator gas fireplace is a critical step in the installation process. This section details the necessary steps to ensure a safe and secure gas connection.

First and foremost, it is imperative to shut off the gas supply to the fireplace before attempting any connection. This safety precaution is crucial to prevent gas leaks and potential hazards.

Next, carefully inspect the gas lines for any signs of damage or leaks. If any damage is detected, it is essential to repair or replace the lines before proceeding.

Once the gas lines have been inspected and deemed safe, connect them to the fireplace using the appropriate fittings and connections. Ensure that all connections are tight and secure to prevent gas leaks.

Finally, after completing the gas line connections, thoroughly test for any leaks using a gas leak detector. This step is essential to ensure the safety of the gas system and prevent any potential hazards.

Vent Installation

Proper vent installation is crucial for safe and efficient operation of your Heatilator gas fireplace. The vent system carries combustion byproducts away from your home, ensuring a clean and healthy environment.

Begin by carefully reviewing the vent installation instructions provided with your fireplace. These instructions will specify the type of vent required, the appropriate vent diameter, and the proper installation methods.

Ensure that the vent is installed according to local building codes and regulations. This ensures compliance with safety standards and proper ventilation.

During installation, pay close attention to the vent termination point. The vent should be terminated outside the home, ensuring proper venting of combustion byproducts.

After installation, perform a thorough inspection of the vent system for any leaks or obstructions. This ensures proper airflow and prevents potential hazards associated with improper ventilation.

Operation

Operating your Heatilator gas fireplace is straightforward and enjoyable. Before starting your fireplace, ensure all safety precautions are in place and you are familiar with the controls.

Familiarize yourself with the location and function of the ignition switch, gas valve, and any other control mechanisms. These controls will allow you to safely start and adjust your fireplace.

Always consult the user manual for specific instructions on starting and operating your particular model. This will provide detailed guidance on safely igniting your fireplace and adjusting the flame height.

If equipped with a remote control, learn how to operate it to control the fireplace’s functions, including turning it on and off, adjusting the flame, and setting the thermostat.

Regularly check for any signs of malfunction or unusual operation. If you notice any issues, consult the troubleshooting section of this manual or contact your local dealer for assistance.

Starting the Fireplace

Starting your Heatilator gas fireplace is a simple process, but it is crucial to follow the instructions carefully for safe operation. Before starting, ensure the area around the fireplace is clear of any flammable materials and that the vent is open and unobstructed.

Locate the ignition switch and turn it to the “On” position. This will initiate the ignition sequence.

The fireplace will begin to ignite, and you will hear a clicking sound as the igniter attempts to spark the gas.

Once the gas ignites, you will see a flame appear in the burner.

If the gas does not ignite after a few seconds, turn the ignition switch off and try again.

If the ignition fails repeatedly, consult the troubleshooting section of this manual or contact your local dealer for assistance.

Adjusting Flame Height

To adjust the flame height on your Heatilator gas fireplace, locate the flame adjustment control. This control may be a knob, a lever, or a button, depending on your specific model.

To increase the flame height, turn the control clockwise. To decrease the flame height, turn the control counterclockwise.

Adjust the flame height to your desired level. Note that the flame height should not be adjusted to a point where it is too high or too low, as this can affect the efficiency and performance of your fireplace.

If you have difficulty adjusting the flame height, consult the troubleshooting section of this manual or contact your local dealer for assistance.

Remote Control Operation

Many Heatilator gas fireplaces come equipped with a wireless remote control for convenient operation. The remote control typically features buttons for turning the fireplace on and off, adjusting the flame height, and controlling the thermostat.

To use the remote control, first ensure that the batteries are installed correctly. Then, point the remote control towards the fireplace’s receiver.

The receiver is usually located near the fireplace’s control panel. Press the desired buttons on the remote control to adjust the fireplace’s settings. Consult the specific instructions for your model’s remote control for detailed information on its functionality and features.

Maintenance

Regular maintenance is crucial for ensuring the safe and efficient operation of your Heatilator gas fireplace. It’s important to follow the manufacturer’s recommended maintenance schedule and guidelines. This typically involves inspecting the fireplace for any signs of damage or wear and tear, cleaning the fireplace to remove dust and debris, and checking the gas lines for leaks.

To maintain your Heatilator gas fireplace, you may need to purchase replacement parts, such as a new pilot assembly or burner. Always use genuine Heatilator parts to ensure compatibility and safety. If you are unsure about any maintenance procedures, consult your owner’s manual or contact a qualified technician.

Cleaning the Fireplace

Regular cleaning of your Heatilator gas fireplace is essential for maintaining its performance and ensuring safe operation. Before cleaning, always disconnect the gas supply to the fireplace and allow it to cool completely. Use a soft-bristled brush or vacuum cleaner with a brush attachment to remove dust and debris from the firebox, glass panels, and exterior surfaces.

If you have a gas log set, you can clean it with a damp cloth and mild soap. Avoid using harsh chemicals or abrasive cleaners that could damage the finish of the fireplace. After cleaning, reconnect the gas supply and test the fireplace to ensure it is working properly.

Inspecting the Gas Lines

Regular inspection of the gas lines connected to your Heatilator gas fireplace is crucial for safety and proper operation. Before inspecting the gas lines, ensure the gas supply to the fireplace is turned off and that the fireplace has cooled down completely.

Visually inspect the gas lines for any signs of damage, leaks, or corrosion. Look for cracks, dents, or rust on the lines. Check for any loose connections or fittings. If you notice any damage or leaks, immediately contact a qualified gas technician to repair or replace the affected gas lines.

It is recommended to have a qualified gas technician inspect the gas lines annually to ensure their safety and proper function.

Replacing Parts

Over time, certain parts of your Heatilator gas fireplace may need replacement due to wear and tear or damage. It is important to use genuine Heatilator replacement parts to ensure proper fit, safety, and performance.

To obtain replacement parts, you can contact your local Heatilator dealer or visit the Heatilator website. When ordering parts, be sure to provide the model number of your fireplace.

If you are not comfortable replacing parts yourself, it is recommended to contact a qualified gas technician. They have the expertise and tools to safely and correctly install replacement parts.

Troubleshooting

While Heatilator gas fireplaces are designed for reliable operation, occasional issues may arise. This section provides guidance on resolving common problems.

Before attempting any troubleshooting, ensure the fireplace is turned off and cooled down. Refer to the specific troubleshooting section in your user manual for detailed instructions and safety precautions.

If you encounter any problems that you cannot resolve yourself, contact your local Heatilator dealer or authorized service technician. They have the expertise to diagnose and repair any issues.

Common Problems and Solutions

Here are some common issues you might encounter with your Heatilator gas fireplace and their possible solutions⁚

  • No flame ignition⁚ Check if the gas supply is turned on and the pilot light is lit. If the pilot light is not lit, refer to your user manual for re-lighting instructions.
  • Weak or flickering flame⁚ This could indicate a low gas pressure or a clogged burner. Adjust the gas valve or clean the burner as per your manual.
  • Unusually loud noises⁚ Check for any loose components or obstructions in the fireplace. Ensure proper ventilation and consult your manual if needed.
  • Remote control malfunctions⁚ Replace the batteries in the remote. If the issue persists, refer to your user manual for troubleshooting steps or contact Heatilator customer support.

Always prioritize safety and consult your user manual for detailed instructions before attempting any repairs.

Contacting Customer Support

If you’ve exhausted troubleshooting steps in the user manual or need further assistance, Heatilator offers multiple ways to reach their customer support team⁚

  • Visit their website⁚ Navigate to the “Contact Us” section on the Heatilator website, where you can find contact information for their customer service department. You can also access FAQs and online resources.
  • Locate a local dealer⁚ Refer to the dealer locator tool on the Heatilator website to find a local authorized dealer. They can provide expert assistance with troubleshooting, repairs, and product information.
  • Phone support⁚ The Heatilator website should list a phone number for their customer support line. This allows you to speak directly with a representative for immediate assistance.

When contacting customer support, be prepared to provide details about your fireplace model, the issue you’re experiencing, and any troubleshooting steps you’ve already taken.

stationary bike manual

Stationary Bike Manual⁚ A Comprehensive Guide

This comprehensive guide provides everything you need to know about stationary bikes, from their different types and how to choose the right one for you, to safety precautions, assembly, and using the bike effectively; This manual will also cover maintenance tips, troubleshooting, and more. Whether you’re a beginner or a seasoned cyclist, this guide will help you make the most of your stationary bike experience.

Introduction

Stationary bikes, also known as exercise bikes, offer a convenient and effective way to improve your cardiovascular fitness, build endurance, and tone your body. They provide a low-impact workout, making them suitable for people of all fitness levels, including those with joint pain or injuries. Stationary bikes are a versatile piece of equipment that can be used for a variety of workouts, from leisurely rides to intense interval training. Whether you’re looking to lose weight, improve your overall health, or simply enjoy a low-impact workout, a stationary bike can be a valuable addition to your fitness routine. This manual will guide you through the ins and outs of stationary bikes, equipping you with the knowledge to make the most of this versatile exercise tool.

Types of Stationary Bikes

Stationary bikes come in a variety of styles, each with its own unique features and benefits. The most common types include⁚

  • Upright Bikes⁚ These bikes mimic the riding position of a traditional road bike, with a more upright posture. They are generally more affordable and compact than other types of stationary bikes.
  • Recumbent Bikes⁚ These bikes feature a reclined seat and a backrest, providing a more comfortable and supportive riding experience. They are often preferred by individuals with back pain or limited mobility.
  • Spin Bikes⁚ Designed for high-intensity interval training (HIIT), spin bikes offer a heavy flywheel and adjustable resistance, allowing for challenging workouts that mimic the experience of cycling outdoors.

The type of stationary bike you choose will depend on your individual needs and preferences. Consider factors such as your fitness level, comfort, and desired workout intensity when making your decision.

Choosing the Right Stationary Bike

Selecting the right stationary bike is crucial for achieving your fitness goals and ensuring a comfortable workout experience. Consider these factors when making your choice⁚

  • Your Fitness Level⁚ If you’re a beginner, a basic upright bike with adjustable resistance levels is a good starting point. As you progress, you might consider a spin bike for more challenging workouts.
  • Comfort⁚ If you have back pain or prefer a more relaxed riding position, a recumbent bike might be the best option. Upright bikes can be more intense but may not be suitable for everyone.
  • Features⁚ Look for features like adjustable resistance, a comfortable seat, and a user-friendly console that tracks your progress. Some bikes offer built-in workout programs, heart rate monitoring, and even entertainment options.
  • Budget⁚ Stationary bikes range in price from a few hundred dollars to several thousand dollars. Set a budget before you start shopping and consider the features that are most important to you.
  • Space⁚ Measure the space you have available before purchasing a stationary bike. Some models are foldable for easy storage, while others are more bulky and require dedicated space.

Ultimately, the best stationary bike for you is the one that meets your individual needs and preferences.

Safety Precautions

While stationary bikes offer a safe and effective way to exercise, it’s essential to prioritize safety during every workout. Follow these precautions to minimize the risk of injury⁚

  • Warm-up and Cool-down⁚ Before starting your workout, engage in a 5-10 minute warm-up to prepare your muscles for exercise. After your workout, cool down for another 5-10 minutes to gradually reduce your heart rate and prevent muscle soreness.
  • Proper Posture⁚ Maintain a comfortable and upright posture while riding. Avoid hunching over or leaning too far forward. Adjust the seat and handlebars to ensure a natural and ergonomic position.
  • Resistance Level⁚ Start with a low resistance level and gradually increase it as you build strength and endurance. Avoid pushing yourself too hard, especially when starting out.
  • Hydration⁚ Drink plenty of water before, during, and after your workout to stay hydrated. Dehydration can lead to fatigue and dizziness.
  • Listen to Your Body⁚ If you experience any pain, stop exercising immediately and consult a healthcare professional.
  • Proper Clothing and Footwear⁚ Wear comfortable, breathable clothing and athletic shoes that provide good support.

By following these safety precautions, you can enjoy a safe and effective workout on your stationary bike.

Assembly and Setup

Assembling your stationary bike is usually straightforward, but it’s crucial to follow the manufacturer’s instructions carefully. These instructions will typically include detailed diagrams and step-by-step guidance.

Here’s a general overview of the assembly process⁚

  • Unpack the Box⁚ Carefully unpack the box and identify all the parts included.
  • Assemble the Frame⁚ Connect the frame components, using the provided tools and fasteners.
  • Attach the Seat Post⁚ Insert the seat post into the frame and secure it with the appropriate clamp or bolt.
  • Install the Seat⁚ Slide the seat onto the seat post and adjust its height.
  • Attach the Handlebars⁚ Connect the handlebars to the frame, ensuring they are securely fastened.
  • Install the Pedals⁚ Attach the pedals to the crank arms, making sure the right pedal is threaded clockwise and the left pedal is threaded counterclockwise.
  • Connect the Console (if applicable)⁚ If your bike has a console, connect it to the frame and power it on.

Once assembled, carefully inspect all connections and ensure everything is secure.

Seat Adjustment

Proper seat adjustment is crucial for comfort, efficiency, and preventing injuries. The goal is to find a position that allows for a smooth pedaling motion without excessive strain on your knees, hips, or back;

Here’s how to adjust the seat⁚

  1. Start with a General Height⁚ Stand next to your bike and adjust the seat so that it’s roughly at hip level. This is a starting point, and you may need to adjust it further;
  2. Sit on the Bike⁚ Sit on the bike and place your feet on the pedals. Your knees should be slightly bent at the bottom of the pedal stroke, with no excessive stretching or bending.
  3. Fine-Tune Adjustment⁚ Adjust the seat height up or down, making small adjustments until you find a comfortable position that allows for smooth pedaling without any strain.
  4. Adjust the Seat Position⁚ Many stationary bikes allow you to adjust the seat forward or backward. Experiment with this adjustment to find a position that feels comfortable and allows you to maintain good posture.

It’s important to adjust the seat height and position before each workout. If you’re unsure about the correct adjustments, consult with a fitness professional.

Handlebar Adjustment

Adjusting the handlebars on your stationary bike is essential for achieving a comfortable and efficient workout posture. A properly adjusted handlebar position allows for a natural alignment of your spine, shoulders, and wrists, reducing strain and promoting good form.

Here’s a step-by-step guide to handlebar adjustment⁚

  1. Start with a Neutral Position⁚ Sit on the bike with your feet on the pedals. Your elbows should be slightly bent and your wrists should be in line with your forearms.
  2. Adjust Height⁚ Most stationary bikes have adjustable handlebars that can be raised or lowered. Adjust the height so that your elbows are slightly bent, and you’re not reaching too far or hunching over.
  3. Adjust Distance⁚ Some bikes also allow you to adjust the distance between the handlebars and the seat. Adjust this so that your shoulders are relaxed and you’re not reaching too far or feeling cramped.
  4. Test and Fine-Tune⁚ Once you’ve made initial adjustments, take a few minutes to ride the bike and feel for any discomfort or strain. Fine-tune the handlebar position as needed until you find a position that feels natural and comfortable.

Remember, proper handlebar adjustment is subjective and can vary depending on your individual body mechanics and riding style. Experiment with different positions to find what works best for you.

Resistance Level

The resistance level on your stationary bike determines the intensity of your workout. Adjusting the resistance allows you to control the difficulty of pedaling and the amount of effort required. Higher resistance levels increase the challenge, requiring more muscle engagement and energy expenditure, while lower levels provide a lighter workout.

Here’s a guide to understanding and adjusting resistance levels⁚

  • Manual Resistance⁚ Many stationary bikes offer manual resistance, typically controlled by a knob or lever. Turning the knob increases the friction against the flywheel, making pedaling more difficult.
  • Magnetic Resistance⁚ Magnetic resistance systems use magnets to create resistance. These systems are often smoother and quieter than manual resistance systems, offering a wider range of adjustment.
  • Starting Point⁚ Begin with a low resistance level, especially if you’re new to stationary cycling. Gradually increase the resistance as you build strength and endurance.
  • Listen to Your Body⁚ Pay attention to your breathing and heart rate. If you’re struggling to maintain a comfortable pace or your breathing becomes labored, decrease the resistance.
  • Vary Resistance⁚ To challenge different muscle groups and enhance your fitness, experiment with varying the resistance throughout your workout. For example, you could start with a moderate resistance level and then increase it for intervals or hills.

Remember, finding the right resistance level is a personal preference. Experiment with different levels to determine the best setting for achieving your fitness goals and maintaining a comfortable workout experience.

Using the Stationary Bike

Once your stationary bike is properly assembled and adjusted, you’re ready to start cycling. Here’s a guide to getting the most out of your stationary bike workouts⁚

  • Warm-up⁚ Begin with a 5-10 minute warm-up, starting with a low resistance level and gradually increasing the intensity. This helps prepare your muscles for exercise and reduces the risk of injury.
  • Proper Form⁚ Maintain good posture while cycling. Keep your back straight, shoulders relaxed, and core engaged. Engage your leg muscles, focusing on a smooth and controlled pedaling motion.
  • Resistance and Intensity⁚ Adjust the resistance level to challenge yourself while maintaining a comfortable pace. You should be able to talk comfortably during your workout.
  • Hydration⁚ Stay hydrated by drinking plenty of water before, during, and after your workout.
  • Cool-down⁚ End your workout with a 5-10 minute cool-down, gradually reducing the resistance and intensity. This helps your body recover and prevents muscle soreness.

Remember, consistency is key to achieving fitness goals. Aim for at least 30 minutes of stationary bike riding most days of the week.

Workout Programs

Many stationary bikes come with built-in workout programs that can help you achieve your fitness goals. These programs often vary in intensity, duration, and focus, allowing you to target specific areas or challenge yourself in different ways. Some common types of workout programs include⁚

  • Interval Training⁚ This involves alternating between high-intensity bursts and periods of rest or lower-intensity activity. This helps improve cardiovascular fitness and burn calories.
  • Hill Climbs⁚ These programs simulate the experience of climbing hills, which can help build leg strength and endurance.
  • Fat Burning⁚ These programs focus on maintaining a moderate intensity for an extended period, aiming to burn fat and improve cardiovascular health.
  • Endurance⁚ These programs emphasize sustained effort at a moderate intensity, building overall endurance and stamina.

You can also create your own custom workout programs based on your preferences and fitness level. Experiment with different combinations of resistance, intensity, and duration to find what works best for you.

Monitoring Your Progress

Tracking your progress is essential for staying motivated and seeing the results of your hard work. Most stationary bikes come equipped with a built-in console that displays various metrics, such as⁚

  • Time⁚ How long you’ve been riding.
  • Distance⁚ The total distance you’ve covered.
  • Speed⁚ Your current speed in miles per hour or kilometers per hour.
  • Calories Burned⁚ An estimate of the calories you’ve burned during your workout.
  • Heart Rate⁚ If your bike has a heart rate monitor, it will display your current heart rate. This helps you gauge your workout intensity and stay within your target heart rate zone.

It’s helpful to record your workout data in a journal or fitness app. This allows you to track your progress over time and make adjustments to your workouts as needed. You can also set goals, such as riding for a certain amount of time or burning a specific number of calories, to stay motivated and challenge yourself.

arkansas driver’s manual 2023

Arkansas Drivers Manual 2023

The Arkansas Drivers Manual is a comprehensive guide for anyone seeking to obtain a driver’s license in the state. This essential resource covers everything from traffic laws to safe driving practices‚ designed to help you prepare for both the written knowledge test and the driving portion of the licensing process. The Arkansas State Police provides an online option for the drivers license study guide‚ offering manuals for non-commercial‚ commercial‚ and motorcycle licenses. The Arkansas DMV manual covers a variety of topics‚ including road rules‚ road signs‚ and safe driving practices‚ ensuring you have the knowledge to become a responsible and safe driver.

Introduction

The Arkansas Drivers Manual is a comprehensive guide designed to equip aspiring drivers with the knowledge and skills necessary to navigate the roads of Arkansas safely and responsibly. This essential resource serves as a vital tool for preparing for both the written and driving examinations required to obtain a driver’s license in the state. The manual delves into a wide range of topics‚ covering everything from fundamental traffic laws and regulations to advanced driving techniques and safety practices. It provides a clear and concise explanation of road signs‚ markings‚ and signals‚ ensuring drivers understand the language of the road and can react appropriately in various situations. Moreover‚ the Arkansas Drivers Manual highlights the importance of responsible driving habits‚ emphasizing the consequences of reckless behavior and the need for defensive driving strategies. By embracing the information presented within the manual‚ individuals can develop the knowledge and skills necessary to become safe‚ confident‚ and responsible drivers‚ contributing to a safer driving environment for all.

Key Features of the Arkansas Drivers Manual

The Arkansas Drivers Manual boasts a wealth of features designed to make the learning process both effective and engaging. One of its key strengths lies in its comprehensive coverage of essential topics‚ encompassing everything from basic traffic laws and regulations to advanced driving techniques and safety practices. The manual is meticulously structured‚ presenting information in a clear and concise manner‚ making it easy for learners to absorb and retain the knowledge presented. Furthermore‚ the Arkansas Drivers Manual incorporates various visual aids‚ such as diagrams‚ illustrations‚ and photographs‚ to enhance understanding and retention. These visual elements provide a more tangible representation of concepts‚ making them easier to grasp and remember. In addition‚ the manual includes practice tests and quizzes‚ allowing learners to assess their comprehension and identify areas where further study is needed. This self-assessment feature enables individuals to track their progress and tailor their learning experience to their specific needs‚ ensuring they are adequately prepared for the driver’s license exams.

Traffic Laws and Regulations

The Arkansas Drivers Manual provides a thorough overview of the state’s traffic laws and regulations‚ ensuring that aspiring drivers have a solid understanding of the rules of the road. The manual covers a wide range of topics‚ including speed limits‚ right-of-way rules‚ traffic signs and signals‚ lane usage‚ and parking regulations. It delves into the importance of obeying traffic laws‚ emphasizing the safety implications of adhering to these regulations. The manual also covers specific requirements for different types of vehicles‚ such as commercial trucks‚ motorcycles‚ and school buses. Furthermore‚ it outlines the penalties associated with traffic violations‚ highlighting the consequences of breaking the law. By providing this comprehensive information‚ the Arkansas Drivers Manual equips learners with the knowledge necessary to navigate the roads safely and responsibly‚ contributing to a safer driving environment for all.

Safe Driving Practices

The Arkansas Drivers Manual places a strong emphasis on safe driving practices‚ recognizing that responsible driving is paramount to ensuring the safety of all road users. The manual provides detailed guidance on a range of critical aspects of safe driving‚ including defensive driving techniques‚ the importance of maintaining a safe following distance‚ avoiding distractions‚ and managing fatigue. It emphasizes the crucial role of driver awareness‚ encouraging drivers to be constantly vigilant of their surroundings and anticipate potential hazards. The manual also covers safe driving practices in various road conditions‚ such as driving in rain‚ snow‚ and fog. It highlights the importance of adjusting driving speed and techniques to suit the prevailing weather conditions. Furthermore‚ the manual emphasizes the importance of regular vehicle maintenance‚ ensuring that vehicles are in optimal condition to prevent accidents and mechanical failures. By promoting these safe driving practices‚ the Arkansas Drivers Manual aims to equip drivers with the knowledge and skills necessary to navigate the roads safely and responsibly‚ contributing to a safer driving environment for all.

Road Signs and Markings

The Arkansas Drivers Manual provides a comprehensive overview of road signs and markings‚ equipping drivers with the knowledge to understand and interpret these visual cues effectively. The manual covers various types of road signs‚ including warning signs‚ regulatory signs‚ and guide signs‚ each serving a distinct purpose in communicating traffic information and regulations. It emphasizes the importance of recognizing and understanding the shapes‚ colors‚ and symbols used on road signs‚ as these elements convey specific messages about road conditions‚ speed limits‚ and other important information. The manual also delves into the significance of lane markings‚ explaining the different types of lines used on roadways‚ such as solid lines‚ dashed lines‚ and double lines. It underscores the crucial role of lane markings in indicating the appropriate lanes for driving‚ passing‚ and turning‚ ensuring that drivers maintain safe distances and avoid collisions. By providing clear explanations of road signs and markings‚ the Arkansas Drivers Manual empowers drivers to navigate roadways with confidence and make informed decisions while driving.

Vehicle Maintenance and Safety

The Arkansas Drivers Manual emphasizes the importance of regular vehicle maintenance and safety checks as vital components of responsible driving; It provides a comprehensive guide to routine maintenance tasks‚ highlighting the significance of maintaining proper tire pressure‚ ensuring adequate fluid levels‚ and checking the functionality of lights‚ brakes‚ and other essential vehicle systems. The manual underscores the need for regular inspections and repairs‚ emphasizing the importance of addressing any potential issues promptly to prevent accidents and ensure safe driving conditions. It stresses the responsibility of drivers to be familiar with their vehicle’s warning lights and understand the messages they convey. The manual also emphasizes the importance of proper vehicle loading‚ highlighting the dangers of overloading a vehicle and the importance of distributing weight evenly to maintain stability and control. By educating drivers about these essential maintenance and safety practices‚ the Arkansas Drivers Manual promotes responsible vehicle ownership and contributes to a safer driving environment.

Driving with Passengers

The Arkansas Drivers Manual provides comprehensive guidance on responsible driving practices when transporting passengers. The manual emphasizes the importance of securing all passengers‚ regardless of age‚ in appropriate safety restraints‚ including seat belts and car seats for children. It highlights the legal requirements for child passenger safety‚ outlining the specific regulations for using car seats and booster seats based on age and weight. The manual stresses the responsibility of drivers to ensure that all passengers are properly secured before starting the vehicle‚ emphasizing the critical role of seat belts in preventing injuries in the event of an accident. It also addresses the impact of passenger distractions‚ advising drivers to avoid engaging in conversations or activities that could compromise their focus on the road. The manual encourages drivers to prioritize safe driving practices while transporting passengers‚ emphasizing the responsibility to protect both themselves and their passengers from potential hazards.

Driving Under the Influence

The Arkansas Drivers Manual strongly emphasizes the dangers of driving under the influence of alcohol or drugs. It clearly outlines the legal consequences of driving while impaired‚ including fines‚ license suspension‚ and even jail time. The manual highlights the significant risk of accidents and fatalities associated with impaired driving‚ emphasizing the importance of making responsible choices. It provides a detailed explanation of the legal blood alcohol content (BAC) limits in Arkansas‚ outlining the penalties for exceeding those limits. The manual also stresses the impact of prescription medications and over-the-counter drugs on driving abilities‚ advising drivers to consult with their healthcare professionals about potential side effects and driving restrictions. It encourages drivers to plan ahead and designate a sober driver or utilize alternative transportation options if they plan to consume alcohol or drugs. The manual underscores the critical role of responsible choices in ensuring the safety of oneself and others on the road.

Driving with Disabilities

The Arkansas Drivers Manual addresses the needs of individuals with disabilities‚ ensuring that they have access to safe and convenient driving opportunities. The manual provides detailed information regarding the licensing process for drivers with disabilities‚ outlining the requirements for obtaining a driver’s license. It outlines the procedures for individuals with visual impairments‚ including the use of adaptive equipment and the necessary assessments for obtaining a license. The manual also covers the requirements for drivers with hearing impairments‚ explaining the importance of clear communication and the availability of visual aids for communication with law enforcement officers. It provides guidance for drivers with mobility limitations‚ including the use of adaptive vehicles and the necessary modifications to ensure safe driving practices. The manual emphasizes the importance of disclosing any disabilities to the licensing authorities‚ allowing for proper evaluation and the issuance of an appropriate driver’s license. It ensures that individuals with disabilities have equal access to the freedom and convenience of driving while maintaining safety on the roads.

Obtaining a Driver’s License

The Arkansas Drivers Manual provides comprehensive information on the process of obtaining a driver’s license in the state. It outlines the steps involved‚ including the necessary documentation‚ age requirements‚ and the examinations required. The manual emphasizes the importance of passing both the written knowledge test and the driving skills test‚ ensuring that all applicants have a thorough understanding of traffic laws and safe driving practices. It explains the different types of licenses available‚ including non-commercial‚ commercial‚ and motorcycle licenses‚ and the specific requirements for each category. The manual also provides information on the renewal process for existing licenses‚ including the required documentation and the frequency of renewal. It addresses the issuance of learner’s permits and the restrictions associated with them‚ providing guidance for new drivers. The manual highlights the importance of following all licensing procedures and regulations‚ ensuring that all drivers are adequately prepared and qualified to operate vehicles safely on Arkansas roads.

Practice Tests and Resources

The Arkansas Drivers Manual offers a wealth of resources to help you prepare for your driver’s license exam. It provides practice tests that mirror the actual exam format‚ allowing you to assess your knowledge of traffic laws‚ road signs‚ and safe driving practices. These practice tests are designed to familiarize you with the types of questions you can expect on the real exam‚ giving you a realistic preview of the challenges ahead. The manual also offers online resources‚ including interactive learning modules and quizzes‚ to further enhance your understanding of driving rules and regulations. These online resources provide a convenient and engaging way to study‚ allowing you to learn at your own pace and reinforce your knowledge. The Arkansas DMV website also provides access to additional practice tests and study materials‚ complementing the information provided in the manual. By utilizing these practice tests and resources‚ you can increase your confidence and readiness for the driver’s license exam‚ maximizing your chances of success.

The Arkansas Drivers Manual serves as a comprehensive guide for aspiring drivers in the state‚ covering everything from traffic laws to safe driving practices. It is an indispensable resource for anyone preparing for the driver’s license exam‚ providing valuable information and practice tests to ensure a successful outcome. The manual emphasizes the importance of responsible driving‚ highlighting the need to understand and adhere to traffic regulations to ensure the safety of oneself and others on the road. It equips drivers with the knowledge and skills necessary to navigate the roads with confidence and responsibility. By studying the Arkansas Drivers Manual and utilizing the available practice tests and resources‚ individuals can become well-prepared for the driver’s license exam and develop the necessary knowledge and skills to become safe and responsible drivers.

flaming river manual rack

Flaming River Manual Rack⁚ A Comprehensive Guide

This guide provides a comprehensive overview of Flaming River manual steering racks, offering insights into their benefits, applications, installation, performance, and more. We will delve into the advantages of choosing a Flaming River manual rack over stock steering systems, exploring its weight reduction capabilities and efficiency enhancements. Additionally, we will discuss common applications, available models, troubleshooting tips, and maintenance considerations. Whether you are a seasoned enthusiast or a novice mechanic, this guide will equip you with the knowledge necessary to make an informed decision about incorporating a Flaming River manual rack into your vehicle.

Introduction

In the realm of automotive performance enhancements, steering precision and responsiveness play a pivotal role in elevating the driving experience. For enthusiasts seeking to optimize their vehicle’s handling characteristics, a manual steering rack can be a transformative upgrade. Among the leading manufacturers of high-quality steering components, Flaming River stands out as a trusted name in the industry, renowned for its precision engineering and robust construction. Flaming River manual racks are designed to replace factory power steering systems, offering a direct and tactile connection between the driver and the road, resulting in a more engaging and rewarding driving experience. This comprehensive guide will explore the intricacies of Flaming River manual racks, shedding light on their design, benefits, applications, and installation process. From weight reduction and improved handling to enhanced driver feedback, we will delve into the key features and advantages that make Flaming River manual racks a popular choice among performance-minded drivers.

Benefits of a Flaming River Manual Rack

Installing a Flaming River manual rack brings a host of benefits to the table, enhancing both performance and efficiency. One of the most notable advantages is weight reduction. By eliminating the power steering pump, hoses, and associated components, Flaming River manual racks can shave off a significant amount of weight, typically ranging from 10 to 15 pounds. This weight savings translates to improved acceleration, handling, and overall vehicle dynamics. Another key benefit is the enhanced steering feel. The direct connection between the steering wheel and the wheels provides a more precise and responsive steering experience. Drivers can feel the road surface more intimately, allowing for greater control and feedback. This enhanced feel is particularly beneficial for track driving, autocross, and other high-performance applications. Additionally, Flaming River manual racks are known for their durability and reliability. Built with high-quality materials and meticulous craftsmanship, these racks are designed to withstand the rigors of demanding driving conditions. Their robust construction ensures long-lasting performance and peace of mind for the driver.

Applications and Compatibility

Flaming River manual racks find their place in a wide range of applications, catering to both street and track-oriented vehicles. They are particularly well-suited for drag racing, where their lightweight design and responsiveness contribute to faster acceleration times. The direct connection between the steering wheel and the wheels provides precise control, enabling drivers to maintain a consistent line and maximize traction during launches. Furthermore, these racks are popular among enthusiasts who prioritize a pure driving experience. They offer a more tactile and engaging connection to the road, enhancing the overall driving enjoyment. Flaming River offers a variety of manual rack kits designed to fit specific vehicle models. For instance, their FR1503 kit is specifically designed for 1979-1993 Mustang models, while other kits cater to vehicles like the 2005-2014 Mustang and 2010-2015 Camaro. When selecting a Flaming River manual rack, it’s crucial to ensure compatibility with your vehicle’s make, model, and year. Refer to Flaming River’s product catalog or website to find the appropriate kit for your specific application.

Installation and Setup

Installing a Flaming River manual rack typically involves replacing the existing power steering rack with the new manual unit. The process can vary depending on the specific vehicle and kit, but generally involves removing the old rack, mounting the new rack, and connecting the steering linkage. Flaming River provides detailed installation instructions with each kit, which are essential for a successful and safe installation. These instructions often include diagrams, component identification, and step-by-step guidance. It’s recommended to have a basic understanding of automotive mechanics and access to appropriate tools for the installation process. If you’re unfamiliar with automotive repair or lack the necessary equipment, seeking assistance from a qualified mechanic is advised. Properly aligning the wheels after installation is crucial for safe and optimal handling. It’s recommended to have a professional alignment performed after installing the new rack to ensure the wheels are properly aligned and the vehicle tracks straight. This step is essential for optimal performance and safety, particularly on the road.

Performance and Handling Improvements

Flaming River manual racks are renowned for their ability to enhance steering feel and response. By eliminating the power steering system, drivers experience a more direct connection to the road, resulting in a more precise and engaging driving experience. This increased feedback allows for more accurate steering input and a greater sense of control. The manual rack’s directness also translates to quicker steering response, reducing lag between steering wheel input and vehicle reaction. This can be particularly beneficial in performance driving scenarios, where split-second reactions are crucial. Furthermore, the manual rack’s inherent simplicity eliminates the potential for power steering pump failures or issues with hoses and lines, promoting greater reliability and reducing the risk of unexpected steering malfunctions. The absence of a power steering pump also contributes to a quieter driving experience, particularly at low speeds where power steering pumps can generate noticeable noise.

Weight Reduction and Efficiency

One of the primary advantages of a Flaming River manual rack is its significant weight reduction capabilities. By eliminating the power steering pump, hoses, pulleys, and related components, a substantial amount of weight can be shed from the front of the vehicle. This weight savings can range from 10 to 15 pounds, depending on the specific model and application. The reduction in unsprung weight leads to improved handling and acceleration, as the vehicle’s suspension is less burdened by unnecessary mass. Furthermore, the weight reduction can positively impact fuel efficiency, as the engine requires less effort to propel the lighter vehicle. This efficiency gain is particularly noticeable in performance applications, where every ounce of weight reduction can contribute to improved lap times and overall performance. The inherent simplicity of the manual rack also eliminates the parasitic drag associated with the power steering pump, further contributing to improved efficiency and reduced fuel consumption.

Comparison with Stock Steering Systems

When comparing a Flaming River manual rack to stock steering systems, several key differences emerge. The most notable distinction is the absence of power assistance in the manual rack. This means that steering effort is directly proportional to the vehicle’s speed and the load on the tires. While this may seem like a drawback at first, it offers distinct advantages in performance applications. The direct feedback provided by a manual rack allows for precise steering input and a more connected feel with the road. Moreover, the elimination of the power steering pump and its associated components results in a simpler and lighter steering system, contributing to improved handling and reduced weight. However, it’s important to note that manual steering can require more physical exertion, especially at low speeds or when maneuvering in tight spaces. Ultimately, the choice between a manual rack and a stock power steering system depends on the intended use and the driver’s preferences.

Common Applications and Use Cases

Flaming River manual racks find widespread use in a variety of automotive applications, particularly in performance-oriented vehicles. Drag racing is a prime example, where the precise control and reduced weight offered by a manual rack contribute to quicker launches and improved handling. Street/strip cars, which often see dual use on public roads and drag strips, also benefit from the responsive steering and weight savings. Custom builds and engine swaps frequently incorporate manual racks, as they provide flexibility in adapting to modified engine compartments and unique steering geometries. Furthermore, classic car enthusiasts often opt for manual racks to maintain a more authentic driving experience and to improve the handling of older vehicles. The versatility and performance benefits of Flaming River manual racks make them a popular choice for a wide range of automotive projects.

Available Models and Configurations

Flaming River offers a diverse range of manual rack and pinion steering systems, catering to a variety of vehicles and applications. For classic Mustangs, they provide kits specifically designed for 1979-1993 models, available in both standard 20⁚1 ratio and quicker 15⁚1 ratio versions. These kits are engineered to replace the original power steering system, offering weight reduction and enhanced steering response. Their offerings extend to newer Mustangs as well, with kits designed for 1994-2004 models, again available in standard and quick ratio options. These kits are compatible with both the standard 5.0L engine and the Modular engine, providing a comprehensive solution for Mustang owners seeking a manual steering upgrade. Flaming River also produces manual racks for other popular vehicles, including Camaros and various classic muscle cars. Their commitment to providing diverse options ensures that enthusiasts can find a suitable manual rack solution to meet their specific needs and preferences.

Tips and Recommendations

When installing a Flaming River manual rack, there are several key tips and recommendations to consider for optimal performance and a smooth installation process. Firstly, ensure that you have the appropriate tools and equipment for the job. A well-equipped workspace will make the installation process much easier and more efficient. Secondly, carefully review the installation instructions provided by Flaming River. These instructions will guide you through the process step-by-step, minimizing the risk of errors or complications. Thirdly, ensure that all components are properly aligned and secured. This is crucial for proper steering function and safety. Additionally, it’s advisable to test the steering system thoroughly after installation, ensuring that it operates smoothly and provides the desired response. Finally, consider consulting with experienced mechanics or enthusiasts for advice and guidance if you encounter any difficulties during the installation process. By following these tips and recommendations, you can maximize the benefits of your Flaming River manual rack and ensure a successful and satisfying upgrade;

Troubleshooting and Maintenance

While Flaming River manual racks are known for their durability and reliability, occasional troubleshooting and regular maintenance are essential to ensure optimal performance and longevity. If you experience any issues with your steering, such as excessive play, stiffness, or unusual noises, a systematic approach to troubleshooting can help pinpoint the source of the problem. Start by inspecting the steering rack for any visible damage, loose connections, or fluid leaks. Check the tie rod ends for wear and tear, as these components can wear out over time and contribute to steering issues. Ensure that the steering column and rack are properly secured and aligned. If the problem persists, consult with a qualified mechanic for further diagnosis and repair. Regular maintenance, such as lubricating the steering rack and tie rod ends, can help prevent premature wear and ensure smooth operation. It’s also advisable to inspect the steering rack for signs of corrosion or damage during routine vehicle inspections. By addressing any issues promptly and maintaining your Flaming River manual rack according to manufacturer recommendations, you can enjoy its benefits for many years to come.

In conclusion, the Flaming River manual rack stands out as a compelling choice for enthusiasts seeking to enhance their vehicle’s performance and handling characteristics. Its lightweight design, responsive steering, and robust construction make it an ideal solution for a variety of applications, from drag racing to street driving. While it may require a slightly higher level of driver input compared to power steering systems, the benefits of a direct connection to the road and the satisfying feel of manual steering are undeniable. The availability of various models and configurations allows for customization to suit individual needs and vehicle specifications. By carefully considering the advantages, applications, and maintenance considerations outlined in this guide, enthusiasts can confidently choose a Flaming River manual rack to elevate their driving experience and unlock the true potential of their vehicle.

pro t701 thermostat manual

Pro1 T701 Thermostat Manual⁚ A Comprehensive Guide

This manual provides a comprehensive guide to the Pro1 T701 Thermostat, covering everything from installation to operation and troubleshooting․ It’s designed to help you understand the features, benefits, and proper use of your new thermostat․

Introduction

Welcome to the Pro1 T701 Thermostat! This manual serves as your guide to understanding and utilizing this advanced thermostat for your home’s comfort․ The Pro1 T701 Thermostat is designed to provide you with precise temperature control, energy efficiency, and user-friendly operation․ This manual will cover the essential aspects of your thermostat, from installation and wiring to programming and troubleshooting․ Whether you’re a seasoned homeowner or a first-time installer, this comprehensive guide will equip you with the knowledge to maximize the benefits of your Pro1 T701 Thermostat․

Features and Benefits

The Pro1 T701 Thermostat boasts a range of features designed to enhance your home’s comfort and energy efficiency․ Its intuitive interface allows for easy temperature adjustments and programming․ With its non-programmable functionality, you can quickly set your desired temperature without complex scheduling․ The T701’s bright backlight ensures clear visibility even in low-light conditions․ This thermostat is compatible with a variety of heating and cooling systems, offering versatility for various homes․ The T701’s compact design seamlessly blends into any décor while its durable construction ensures long-lasting performance;

Installation Guide

Installing your Pro1 T701 Thermostat is a straightforward process․ Begin by choosing a suitable location, ideally 4 to 5 feet above the floor․ Ensure the area has average temperature and good air circulation․ To mount the thermostat, use screws to secure it to the wall, either vertically or horizontally, depending on your preference․ Carefully connect the wires to the appropriate terminals on the thermostat’s back, ensuring proper polarity․ Align the tabs on the subbase with the corresponding slots on the thermostat’s back and gently push until it snaps into place․ Always consult the wiring diagram provided with your thermostat for specific instructions and safety precautions․

Choosing the Right Location

Selecting the optimal location for your Pro1 T701 Thermostat is crucial for accurate temperature readings and efficient operation․ Choose a spot that is easily accessible for the user, allowing for convenient adjustment of settings․ The location should be representative of the overall temperature in the building, avoiding areas that may be significantly warmer or cooler than the rest of the space․ For example, avoid placing the thermostat near direct sunlight, heat sources, or drafts; Remember, the thermostat should accurately reflect the average temperature of the room or area it controls․

Mounting the Thermostat

The Pro1 T701 Thermostat can be mounted vertically or horizontally, offering flexibility to suit your installation needs․ For a vertical mount, secure the thermostat to the wall using one screw at the top and another at the bottom․ For a horizontal mount, position the screws on the left and right sides of the thermostat․ Ensure that the screws are firmly secured to prevent the thermostat from becoming loose or falling off the wall․ When mounting the thermostat, consider the height of the installation․ A standard recommendation is to place the thermostat approximately 4 to 5 feet above the floor, allowing for comfortable access and visibility․

Wiring Connections

Connecting the wires to the Pro1 T701 Thermostat is a crucial step in the installation process․ Ensure that the power to your HVAC system is switched off before making any wiring connections․ Carefully identify the wires coming from your existing thermostat and match them to the corresponding terminals on the new thermostat․ Refer to the wiring diagram provided in the installation manual for detailed instructions on wire placement․ Make sure that each wire is securely connected to the correct terminal and that the connections are free from any loose or frayed wires․ Once all wires are connected, double-check the connections to ensure they are secure and properly installed before turning the power back on to your HVAC system․

Operation and Settings

The Pro1 T701 Thermostat offers a user-friendly interface for controlling your home’s temperature․ The display clearly shows the current room temperature and allows you to easily adjust the setpoint using the up and down buttons․ The thermostat may also feature a “Hold” function, which allows you to temporarily override the programmed schedule for a specific period․ You can also access various settings options, including fan speed, temperature units (Fahrenheit or Celsius), and display brightness․ Familiarize yourself with the thermostat’s operation and settings to ensure optimal comfort and energy efficiency in your home․

Basic Controls

The Pro1 T701 Thermostat features simple and intuitive controls for everyday use․ The main display shows the current room temperature and allows you to easily adjust the setpoint using the up and down buttons․ The “Hold” button provides temporary override of the programmed schedule, allowing you to maintain a desired temperature for a specific period․ The “Fan” button allows you to switch between automatic and manual fan operation, while the “Mode” button lets you select between heating, cooling, or auto modes․ The “System” button, if available, gives you access to additional settings for system configuration․ These basic controls provide a convenient and straightforward way to manage your home’s temperature comfort․

Programming Options

The Pro1 T701 Thermostat allows you to customize temperature settings for different times of the day and days of the week, maximizing energy efficiency and comfort․ You can program specific temperatures for morning, afternoon, evening, and nighttime, allowing for personalized heating and cooling schedules․ The thermostat supports multiple programming options, including a 7-day schedule with customizable temperature settings for each day, a 5-2 schedule with different settings for weekdays and weekends, and a simple “hold” mode for maintaining a consistent temperature․ These programmable features enable you to optimize your home’s climate control, saving energy and ensuring a comfortable environment throughout the day․

Temperature Settings

The Pro1 T701 Thermostat offers a user-friendly interface for setting your desired temperature․ Using the up and down buttons on the thermostat, you can easily adjust the target temperature for heating or cooling․ The thermostat displays the current room temperature, allowing you to monitor and fine-tune your settings․ The display range of temperature is 41°F to 95°F (5°C to 35°C), ensuring accurate temperature control within a comfortable range․ The control range of temperature is 44°F to 90°F (7°C to 32°C), allowing you to maintain your desired comfort level throughout the year․ The thermostat’s precise temperature settings provide optimal control over your home’s climate, ensuring maximum comfort and energy efficiency․

Troubleshooting

While the Pro1 T701 Thermostat is designed for reliability, you may encounter occasional issues․ This section provides guidance on resolving common problems․ If the thermostat is not displaying the correct temperature, check the battery level and replace if needed․ A low battery indicator will appear on the display․ If the thermostat is not responding to your commands, try resetting it by removing the batteries for 10 seconds and then reinserting them․ If the display is blank, ensure that the thermostat is properly connected to the power source․ If you’re experiencing issues with programming or scheduling, consult the manual for detailed instructions․ In case of persistent problems, contact Pro1 Technologies for technical support․

Common Issues

While the Pro1 T701 Thermostat is designed for reliability, you may encounter occasional issues․ This section provides guidance on resolving common problems․ One common issue is a blank display․ If the display is not showing any information, ensure that the thermostat is properly connected to the power source․ Another frequent problem is the thermostat not responding to commands․ In this case, try resetting it by removing the batteries for 10 seconds and then reinserting them․ If the thermostat is displaying an incorrect temperature, check the battery level and replace if needed․ A low battery indicator will appear on the display․

Resetting the Thermostat

Resetting your Pro1 T701 Thermostat can be necessary to resolve various issues, including malfunctioning settings or unresponsive behavior․ To reset the thermostat, locate the small reset button on the front of the housing․ This button is usually marked with “reset․” Use a small object, such as a toothpick or paperclip, to gently press the reset button․ Hold it down for a few seconds until the display blinks or the thermostat restarts․ This action erases all user settings, returning the thermostat to its factory defaults․ After the reset, you will need to reprogram the thermostat with your desired settings․

Battery Replacement

The Pro1 T701 Thermostat utilizes AA batteries to power its operations․ When the battery power becomes low, the thermostat will display a low battery indicator․ To replace the batteries, follow these steps․ First, remove the thermostat from the subbase․ Locate the battery compartment on the back of the thermostat․ Open the compartment and remove the old batteries․ Insert two new AA batteries, ensuring that the positive (+) and negative (-) ends are aligned correctly․ Close the battery compartment and reattach the thermostat to the subbase․ After replacing the batteries, the thermostat will automatically restart and restore any saved settings․

Warranty Information

Your Pro1 T701 Thermostat comes with a 5-year limited warranty․ To ensure full coverage, it’s essential to register your thermostat within 60 days of installation․ Failure to register within this timeframe will result in the warranty period commencing from the date of manufacture․ The warranty covers defects in materials and workmanship under normal use and conditions․ It does not cover damage resulting from improper installation, misuse, or environmental factors․ For warranty claims, contact the HVAC professional who installed your thermostat or visit the Pro1 website for further instructions․

Registration Process

Registering your Pro1 T701 Thermostat is quick and easy․ You can choose to register online or via mail․ To register online, visit the Pro1 website and locate the registration form․ Fill in the required details, including your name, address, purchase date, and thermostat model number․ Once completed, submit the form to complete the registration process․ Alternatively, you can download a registration form from the Pro1 website, fill it out, and mail it to the address provided⁚ Thermostat Warranty Registration Pro1iaq P․O․ Box 3377 Springfield, MO 65808-3377․ Registration is crucial for ensuring your warranty coverage and accessing important updates and support resources․

Coverage and Exclusions

The Pro1 T701 Thermostat comes with a 5-year limited warranty․ This warranty covers defects in materials and workmanship under normal use and service conditions․ The warranty period begins on the date of manufacture, but if you register your thermostat within 60 days of installation, the warranty period starts on the date of installation․ The warranty does not cover damage caused by accidents, misuse, negligence, improper installation, or modifications․ It also excludes damage resulting from power surges, extreme temperatures, or environmental factors․ If you experience a problem with your thermostat within the warranty period, contact the HVAC professional who installed it or Pro1 Technologies for assistance․

Additional Resources

For further assistance and information, you can access a variety of resources provided by Pro1 Technologies․ Visit their website at www․pro1iaq․com to find downloadable documents, including the full operating manual for the T701 Thermostat․ You can also access contact information for customer support and technical assistance․ The website provides a comprehensive resource center with articles, FAQs, and troubleshooting guides for various Pro1 products․ If you need to register your thermostat for warranty purposes, you can find instructions and a registration form on the Pro1 website․

Pro1 Website

The Pro1 website (www․pro1iaq․com) serves as a valuable resource for owners of Pro1 T701 thermostats․ You can access a wealth of information, including downloadable manuals, FAQs, troubleshooting guides, and warranty registration forms․ The website also provides contact information for customer support and technical assistance․ The website is designed to be user-friendly, with easy navigation and clear organization of content․ Visit the Pro1 website for a comprehensive resource center for your T701 thermostat․

Contact Information

For any questions or concerns related to your Pro1 T701 thermostat, you can contact Pro1 Technologies directly․ Their contact information is readily available on their website, www․pro1iaq․com․ You can also find their contact information in the printed manual that came with your thermostat․ Pro1’s customer service team is dedicated to providing prompt and helpful assistance․ Whether you need help with installation, troubleshooting, or warranty information, their team is ready to answer your questions and provide solutions․

Downloadable Documents

Pro1 provides various downloadable documents on their website to support your thermostat experience․ These documents include user manuals, installation guides, and other helpful resources․ You can find these documents on the “Manuals” section of their website․ The manuals are available in multiple languages to cater to a global audience․ Downloading these documents allows you to access the information you need whenever and wherever you are․ Whether you’re troubleshooting an issue, learning about the programming options, or simply wanting to familiarize yourself with the thermostat, these downloadable resources are a valuable tool․